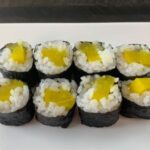

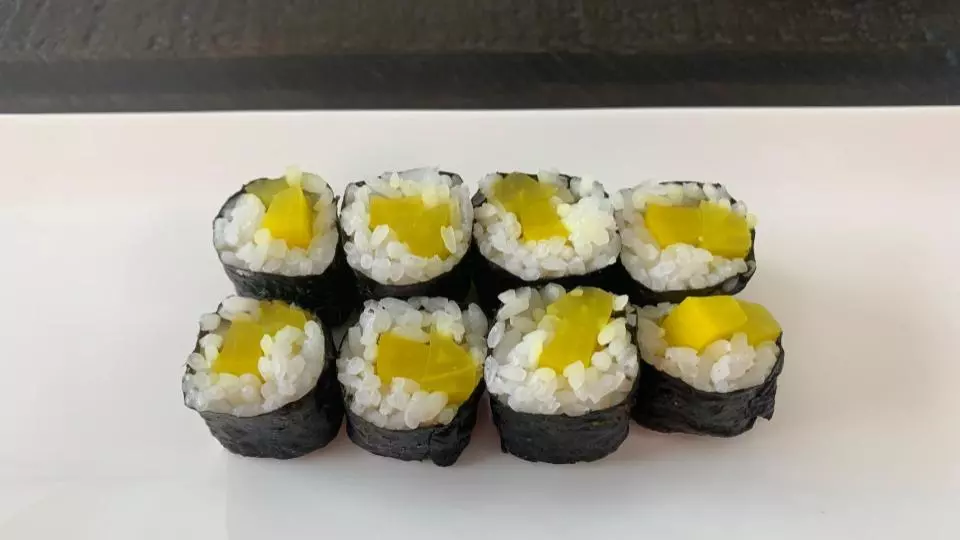
If you frequent sushi restaurants, you are bound to see an interesting looking roll with a yellow filling called an Oshinko roll. When curiosity finally gets the best of you and you decide to try it, you will find Oshinko to be a refreshing pickled filling whose flavor is complemented by the sushi rice in this simple, yet unique roll.
As an added bonus, it’s very simple to make.
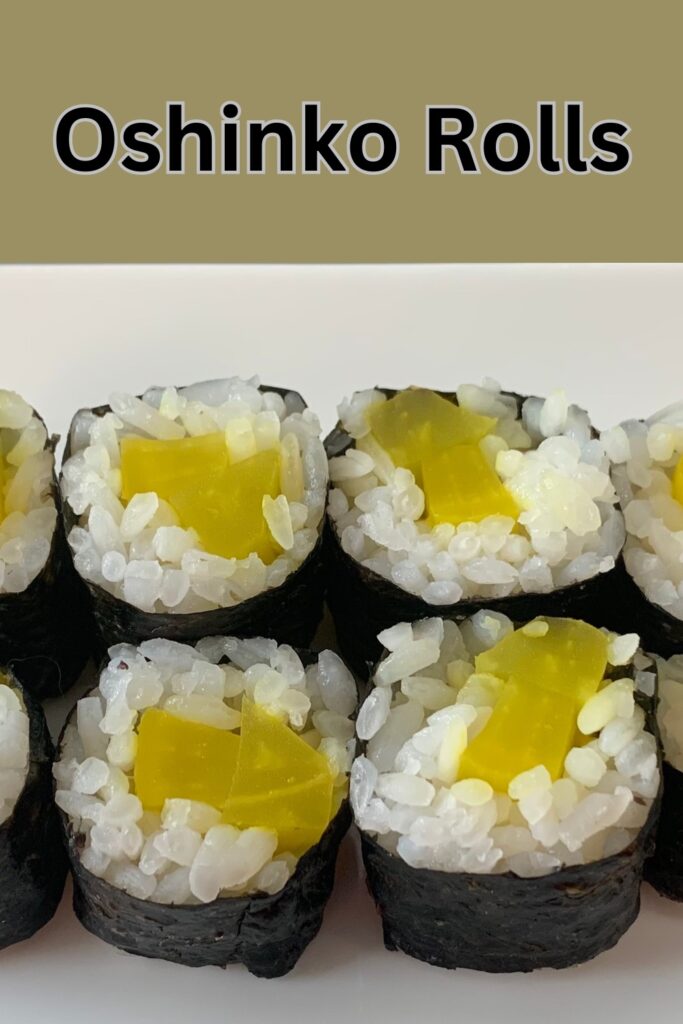
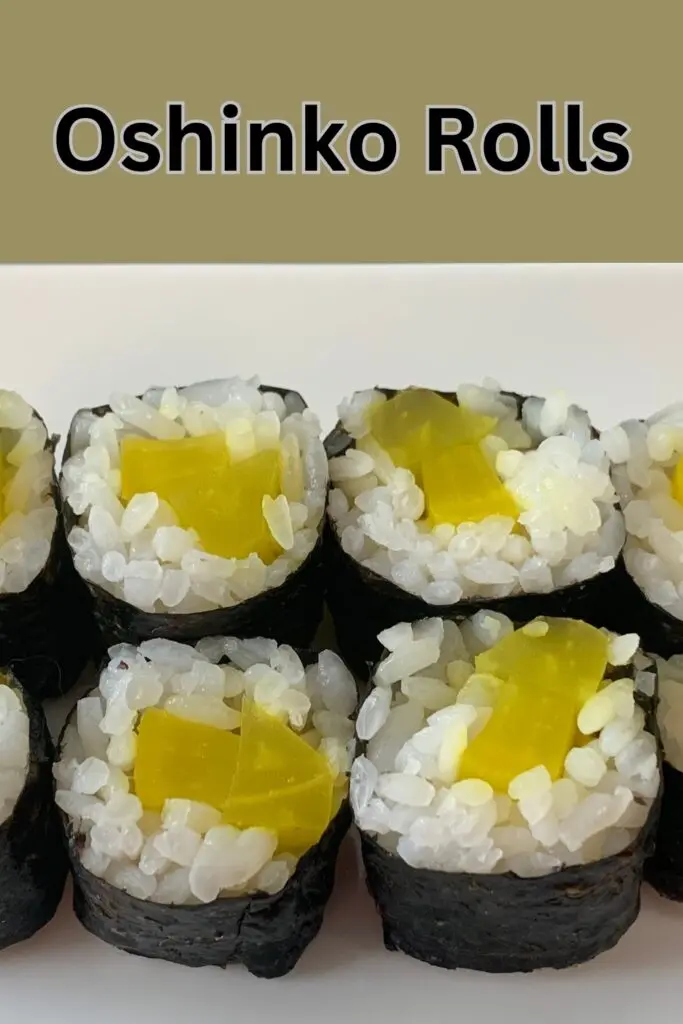
Table of Contents
What is Oshinko?
Oshinko, which literally translates to “fragrant dish,” refers to pickled vegetables. However, when most people talk about Oshinko, they are referring to pickled daikon radishes. Daikon radishes are roughly the shape and size of a large carrot and white in color.
When making Oshinko, daikon radishes are pickled in vinegar, salt and sugar. In addition, people often add yellow food coloring or tumeric to the pickling solution to give the radish the signature yellow color of Oshinko.
If you don’t feel like making your own Oshinko, you can buy yellow pickled radishes in most Japanese or Asian grocery stores. However, it may be labeled as takuan (which just means that it was pickled for a couple months rather than a couple days). I usually buy pickled radish from the store when making Oshinko rolls rather pickling my own just to save time.
While also used in Japanese rice bowls and as a part of salads, the most common use for Oshinko is in a sushi roll called the Oshinko roll. Almost always prepared as a maki roll, meaning the rice is on the inside of the nori sheet (seaweed sheet used to wrap the roll) with the filling, Oshinko rolls are fairly easy to make and usually only contain pickled radish, rice and nori.
How do you Make Oshinko?
If you feel like making your own Oshinko, start with one pound of daikon radish that has been pealed and cut into 1/2 inch strips or thin slices. You will also need 3 tablespoons of rice vinegar, 1/2 cup of sugar, 1 tablespoons of salt, and 1 teaspoon of tumeric.
Combine all ingredients in a large sealable freezer bag, push the air out and mix all the ingredients up in the bag. Once all the pieces of radish are evenly coated with the mixture, place in the fridge for at least 24 hours. Generally, the longer you leave it in the fridge, the more intense the flavor. You can leave it in the fridge for up to 1 month.
The benefit of making your own Oshinko is that you get to tailor it to your specific tastes. For example, lots of people like to add chili powder to their Oshinko to give it a spicer flavor. Or if you are not a turmeric fan, you can add food coloring instead to still give it the yellow pop of color you look for in Oshinko.
How to Control the Thickness of Your Sushi Roll
You can control how thick your sushi rolls are by how much of the nori sheet you use. This recipe uses half the nori sheet which makes smaller rolls. I prefer smaller rolls for this type of sushi as I think they are easier to eat with chopsticks.
However, if you like thicker rolls, you can use the entire nori sheet. This will definitely make the roll thicker and more filling. It also makes it easier to roll. You can also cut off the top 1/4 of the nori sheet to reduce the thickness of the roll depending on your preference.
How do you Make Oshinko Rolls?
Oshinko rolls are very simple to make once you have the ingredients gathered. We have included step-by-step instructions below:
Cook Sushi Rice
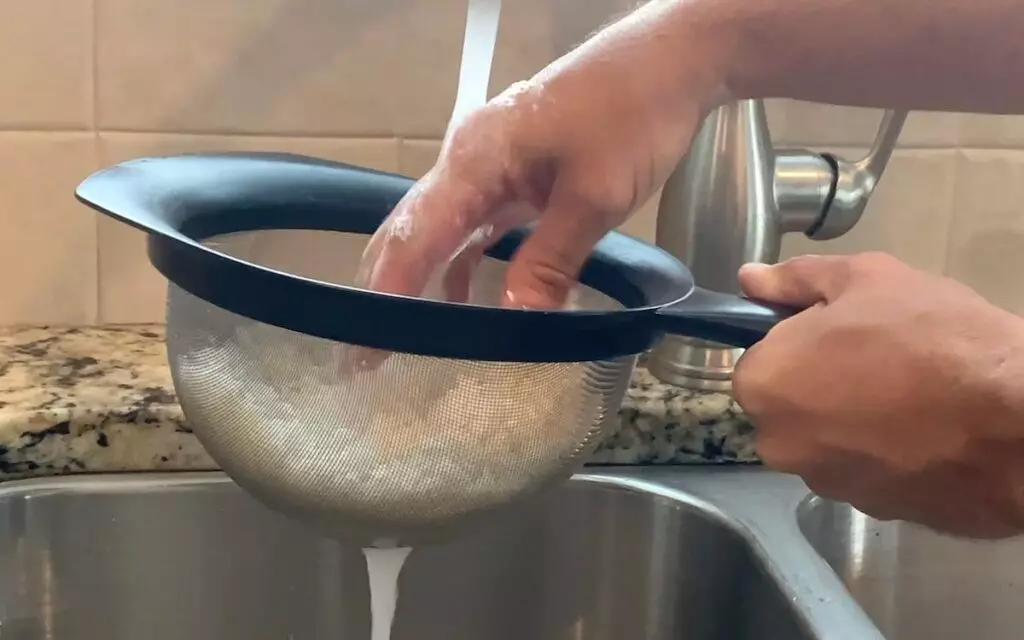
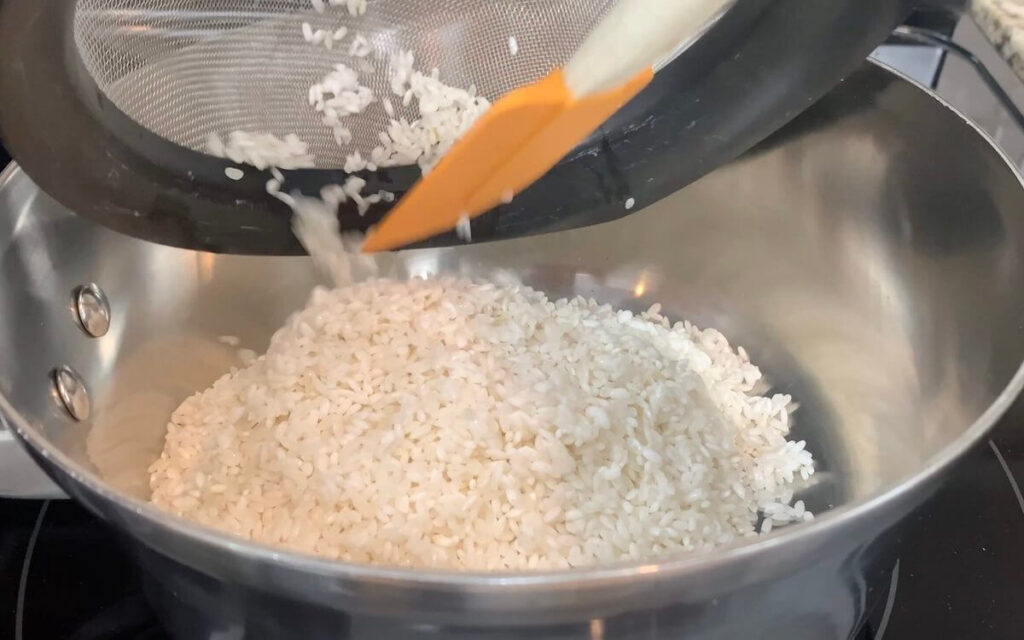
1. Rinse 2/3 cup of sushi rice by placing it in a colander and running water through it until the water is clear.

2. After the rice is rinsed, add it to a sauce pan with 1 cup of water.

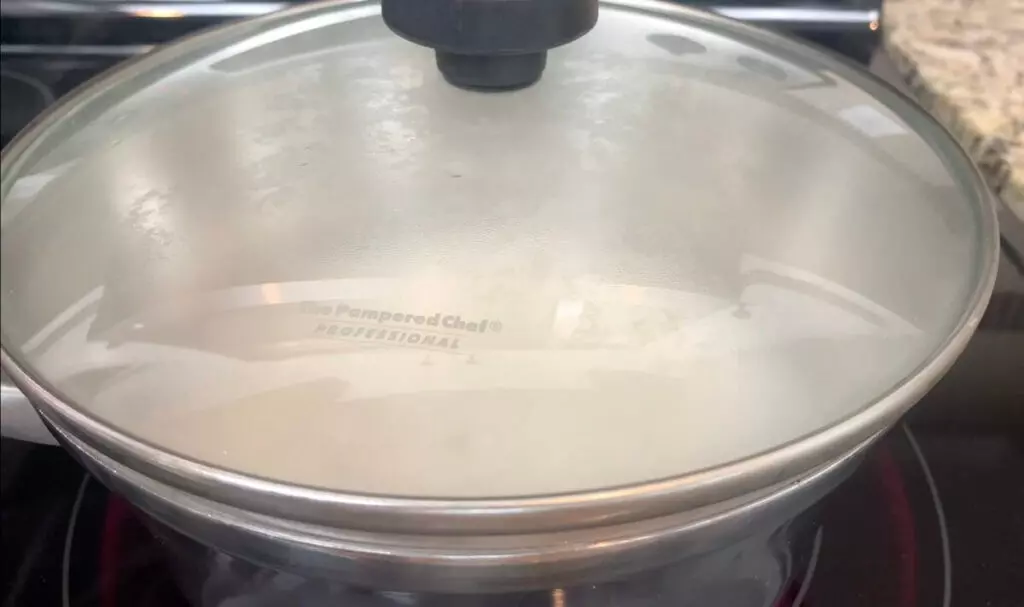
3. Bring the water to a boil and then reduce the heat to low. Cover and let the rice simmer for 20 to 30 minutes, or until the water is absorbed and the rice is soft.

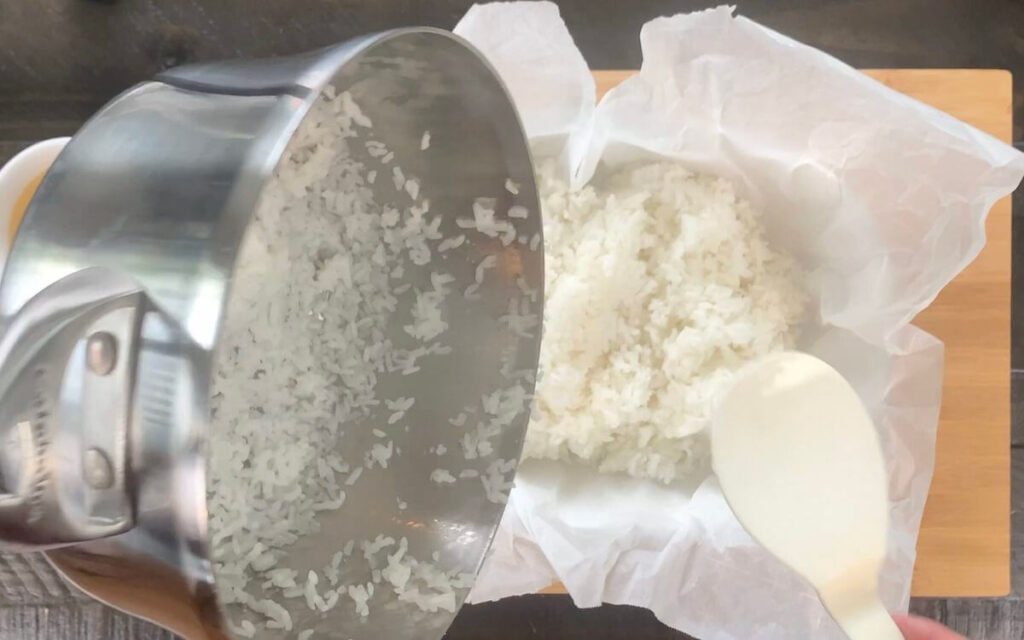
4. Remove the rice and place into a bowl or dish and let cool. I would line the dish with parchment paper prior to adding the rice to avoid sticking.

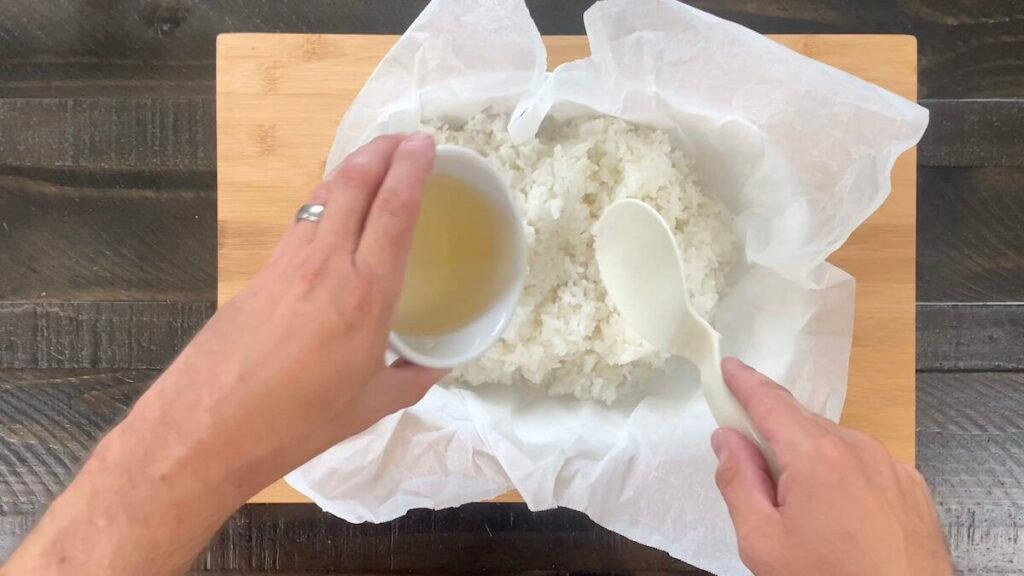
5. Mix 2 tablespoons of sushi vinegar into your rice. Stir until the vinegar has absorbed into the rice. Once cooled and fully absorbed, your rice is ready to roll!

For a more thorough discussion on sushi rice along with a recipe, check out the following article: Sushi Rice: Easy Sushi Rice Recipe
Assemble the Oshinko Rolls
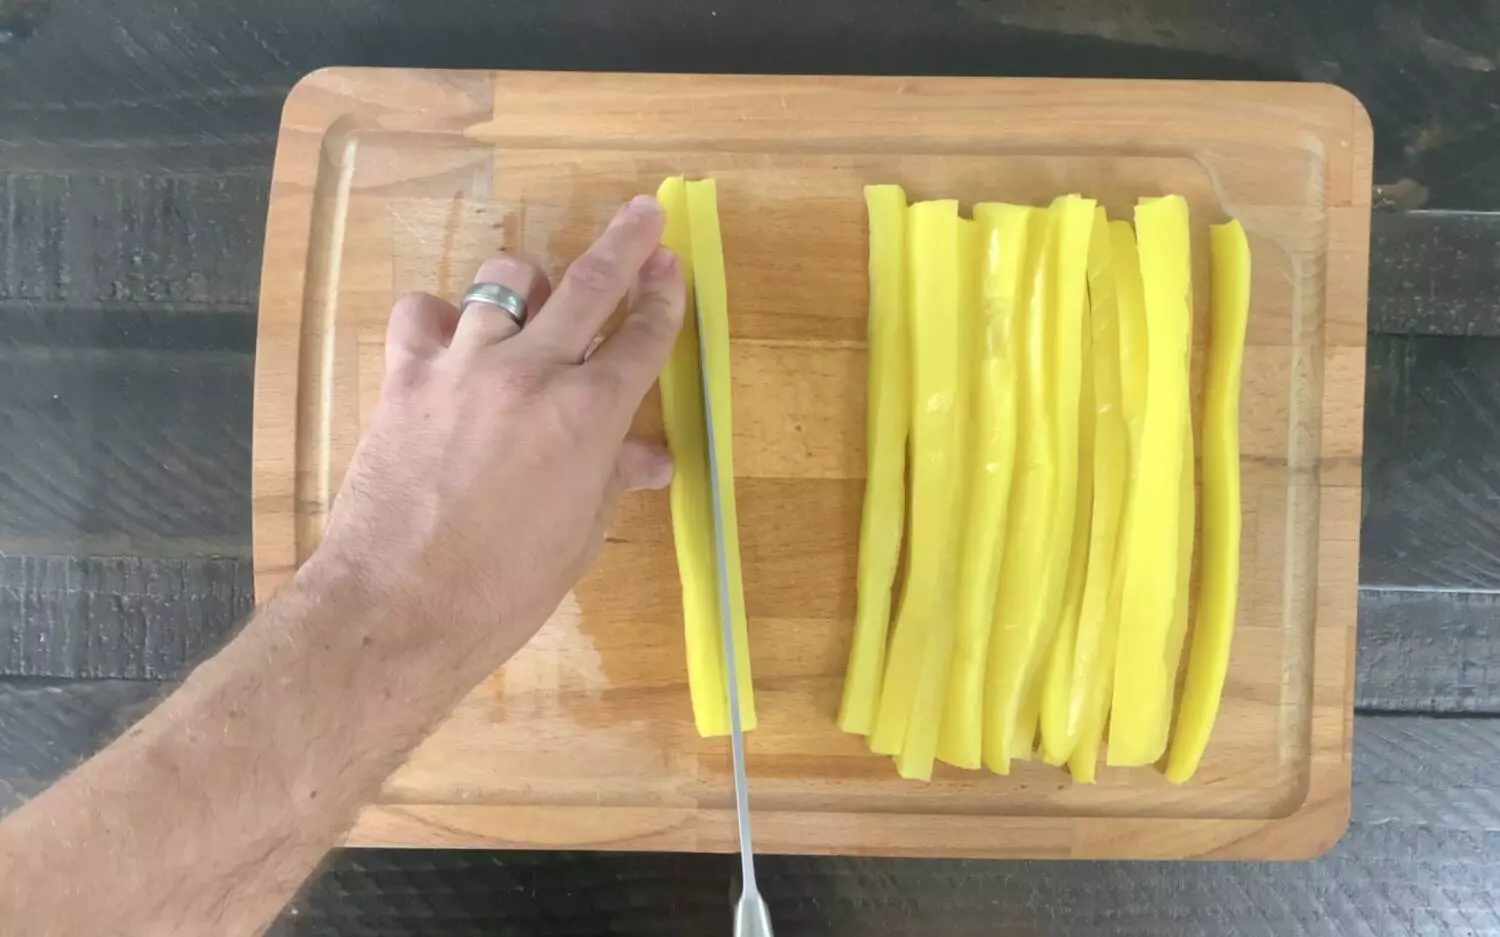
1. Cut the yellow pickled radish: Slice the yellow pickled radish into strips about 1/4 inch thick. If your radish is big enough, cut the strips so it will fit across the long half of your cut nori sheet. If it’s not big enough, cut so it will fit approximately half way across the nori sheet. That way you can fit two across.

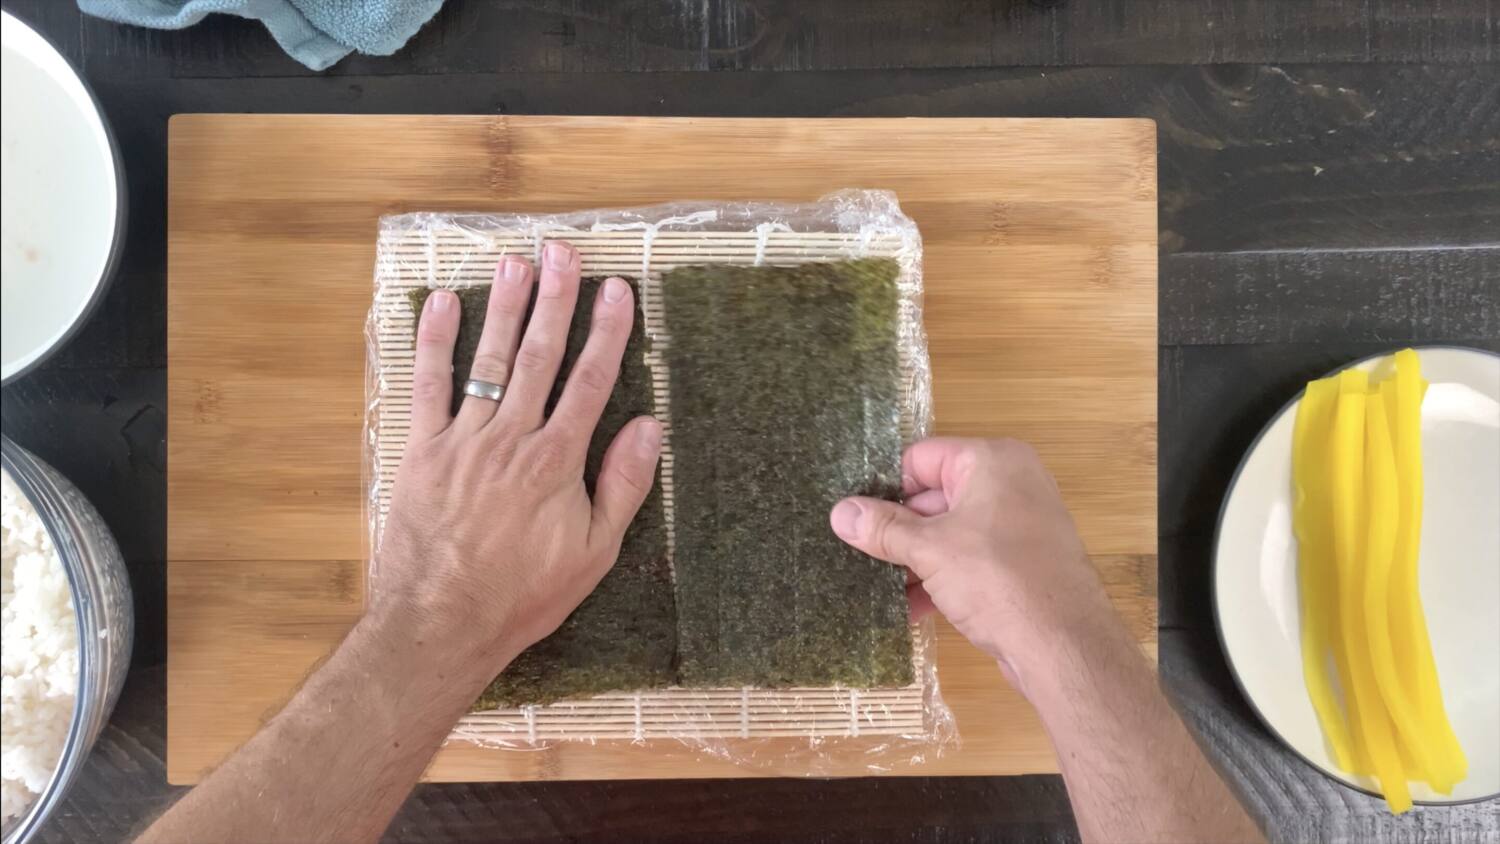
2. Prepare your bamboo sushi mat: Cover your bamboo sushi mat with plastic wrap. This will help keep the rice from sticking to it.
3. Tear or cut the nori sheet in half: Gently fold the nori sheet in half. Then tear the nori sheet in half along the crease. If it does not tear easily, use kitchen shears to cut in half.

3. Press rice onto nori sheets: Next, place the nori sheet onto the plastic wrap with the shiny side facing down. Then press around 1/2 cup of rice onto about 3/4 of the nori sheet in an even layer. Leave about 1/4 of the nori sheet without rice as this will help seal the roll. Tip: Wet your hands prior to handling the sushi rice in a bowl of water mixed with a dash of rice vinegar. This will prevent the rice from sticking to your hands.
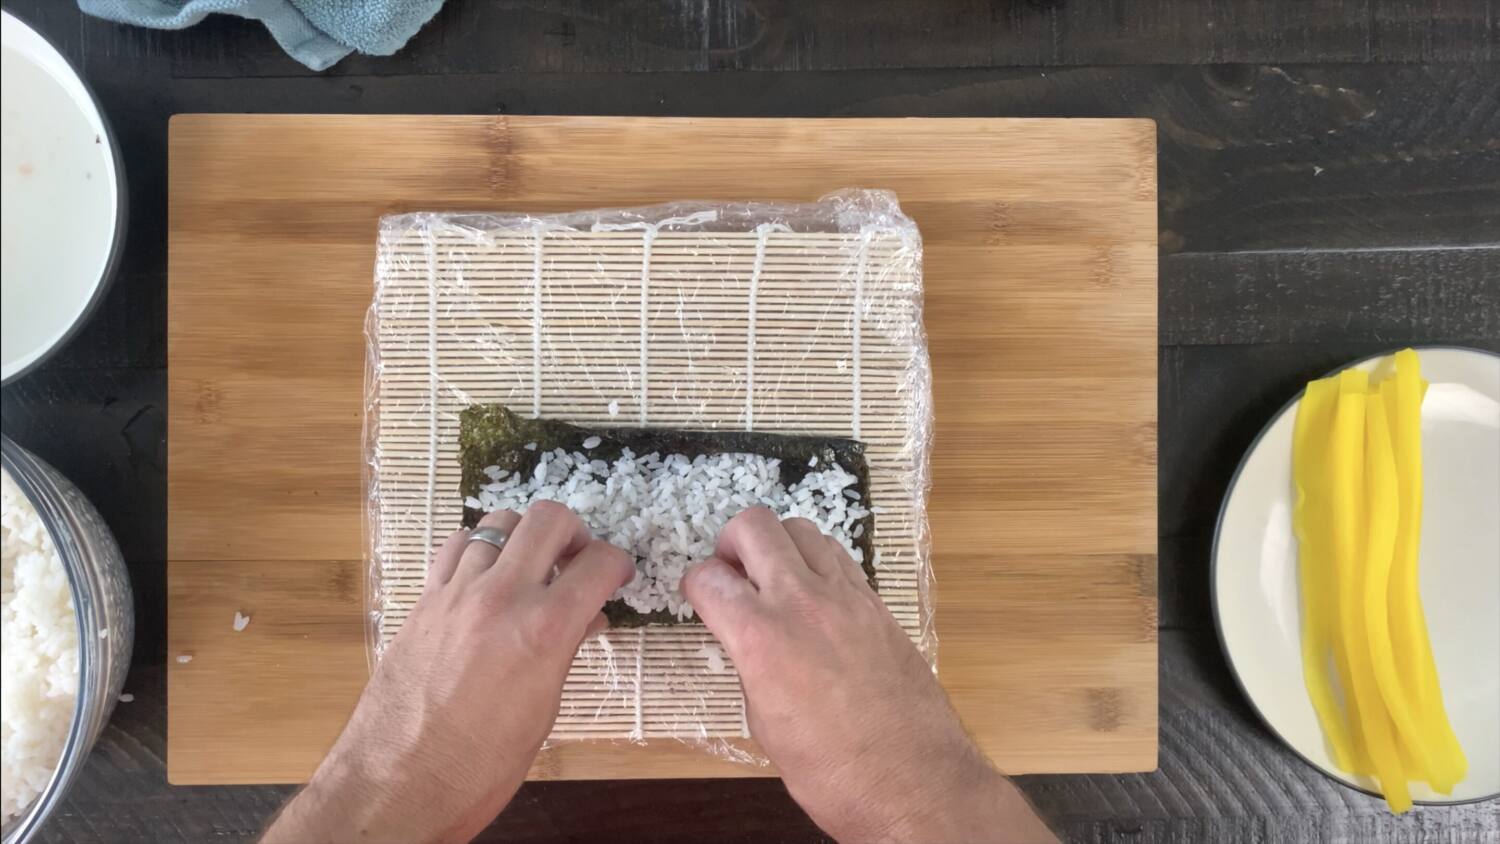
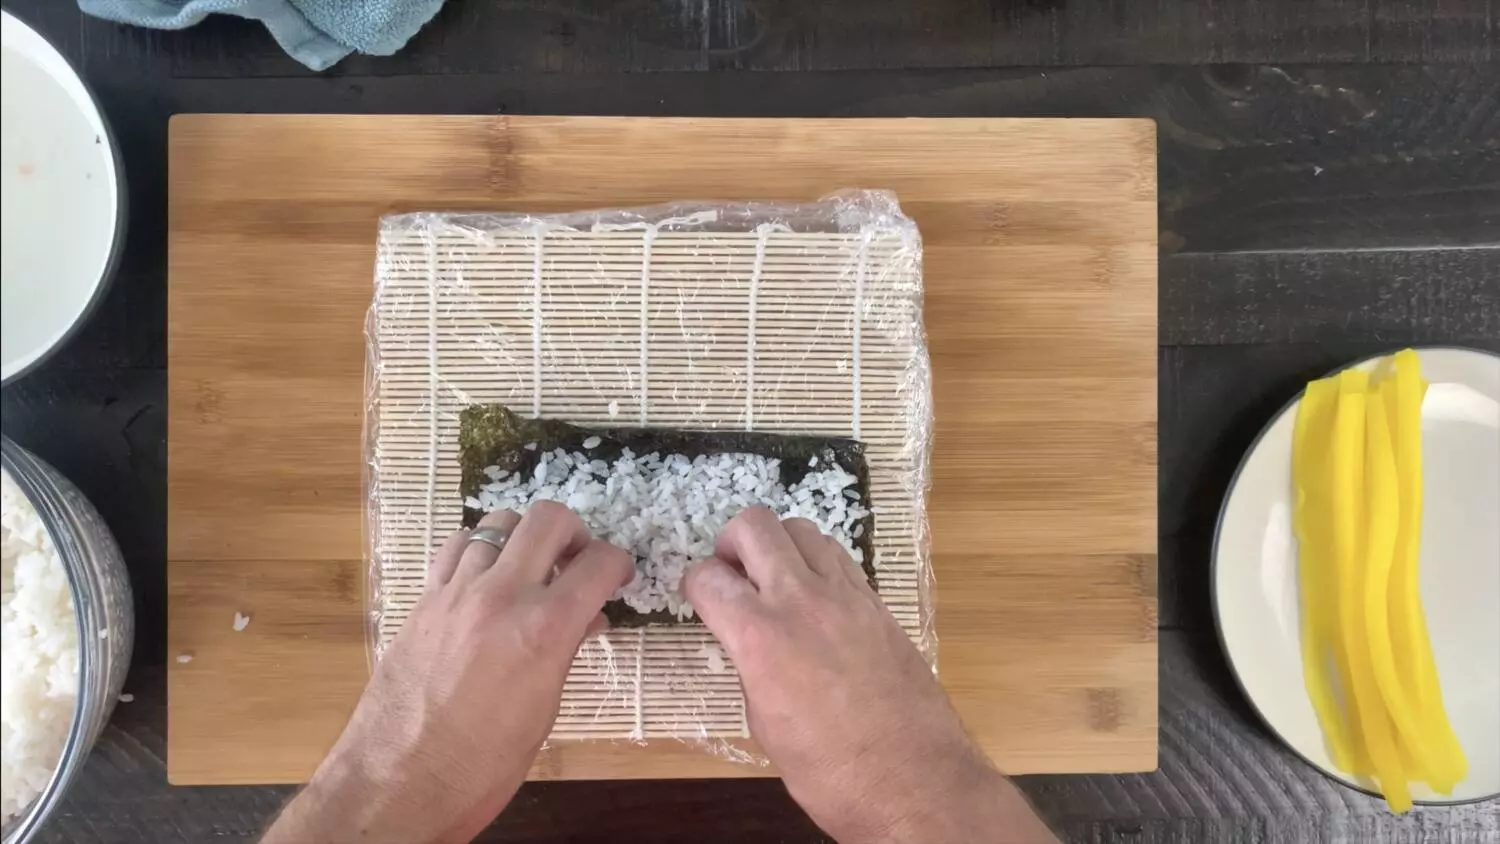
4. Add the yellow pickled radish to the rice: Place the yellow pickled radish onto the rice. If your slices are long enough to fit across the entire nori sheet, I would add three slices per nori sheet. If they are shorter, double up and put six slices on the nori sheet, trying to make it the same thickness across the roll.
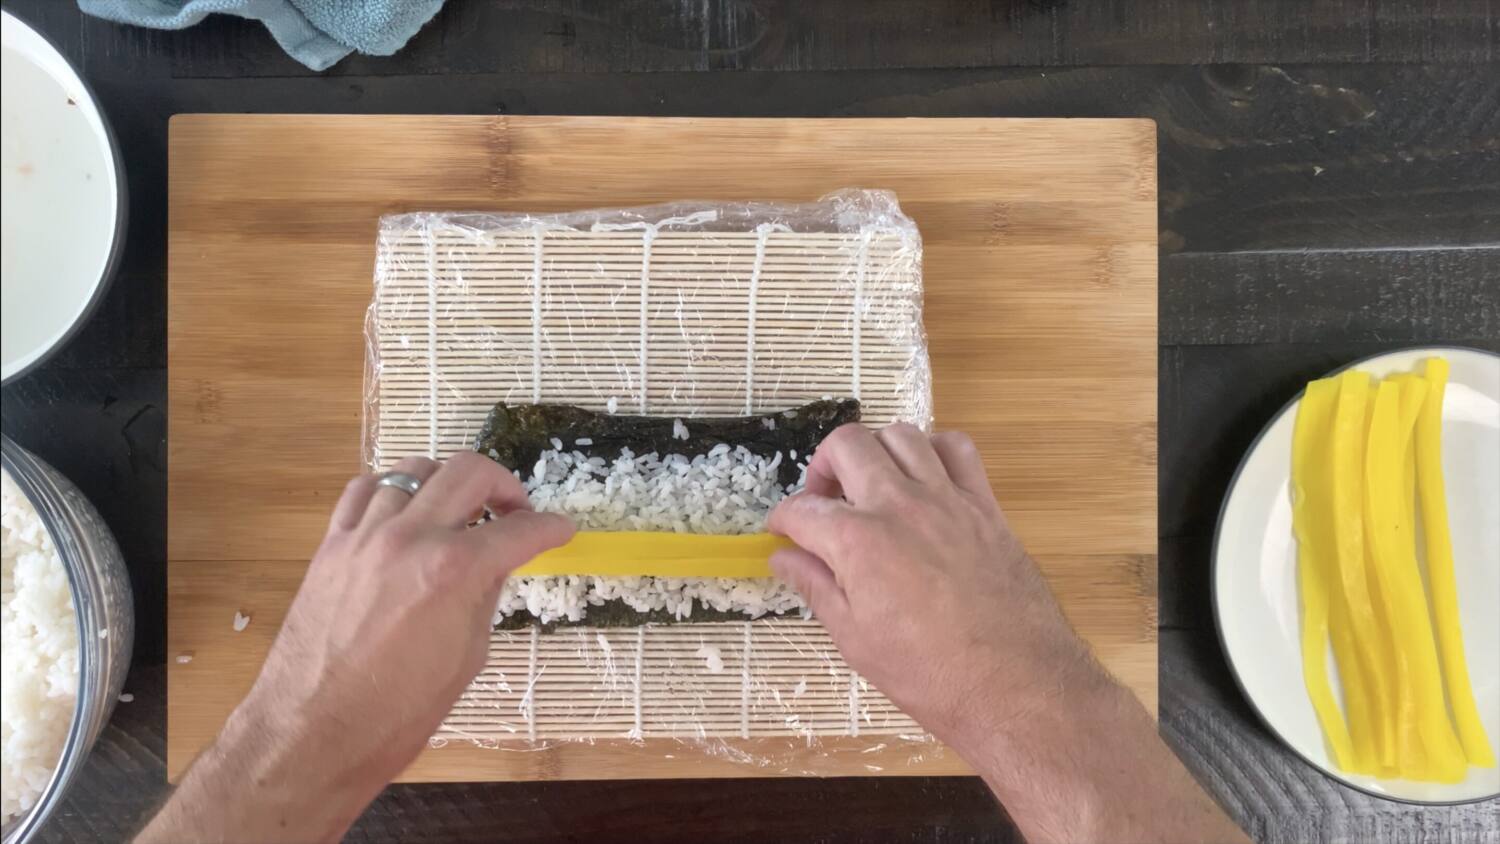

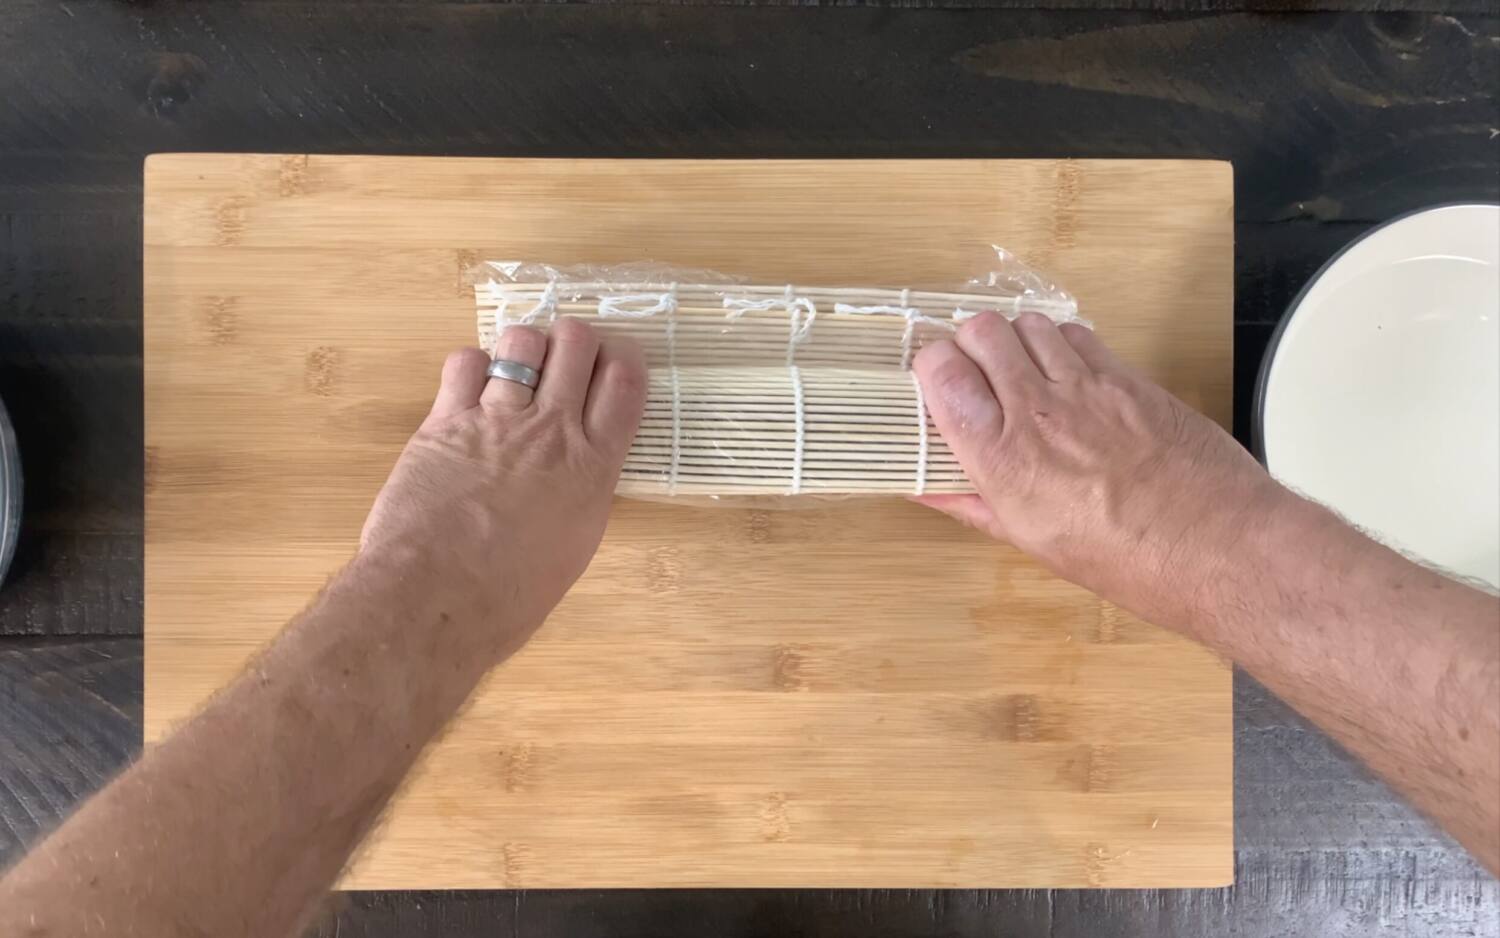
5. Roll the sushi: Wet the part of the nori sheet that does not contain rice. Starting at the side of the nori sheet with rice, use the bamboo sushi mat to fold your roll until it’s completely enclosed. Once the nori is making contact with the rice, pull back the sushi mat so it doesn’t get caught in the sushi. Still using the sushi mat as your guide, finish rolling until the roll is completely wrapped. Then wrap the sushi mat around the roll and gently press, tightening the roll together. Keep in mind that rolling sushi is an art that may take some practice so don’t get frustrated if it doesn’t look perfect your first time. It will get easier the more you do it.

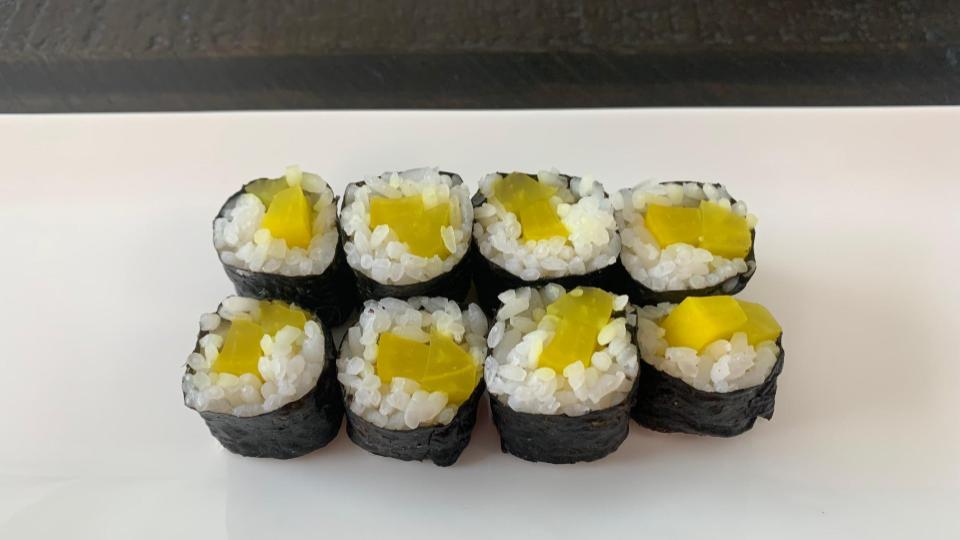
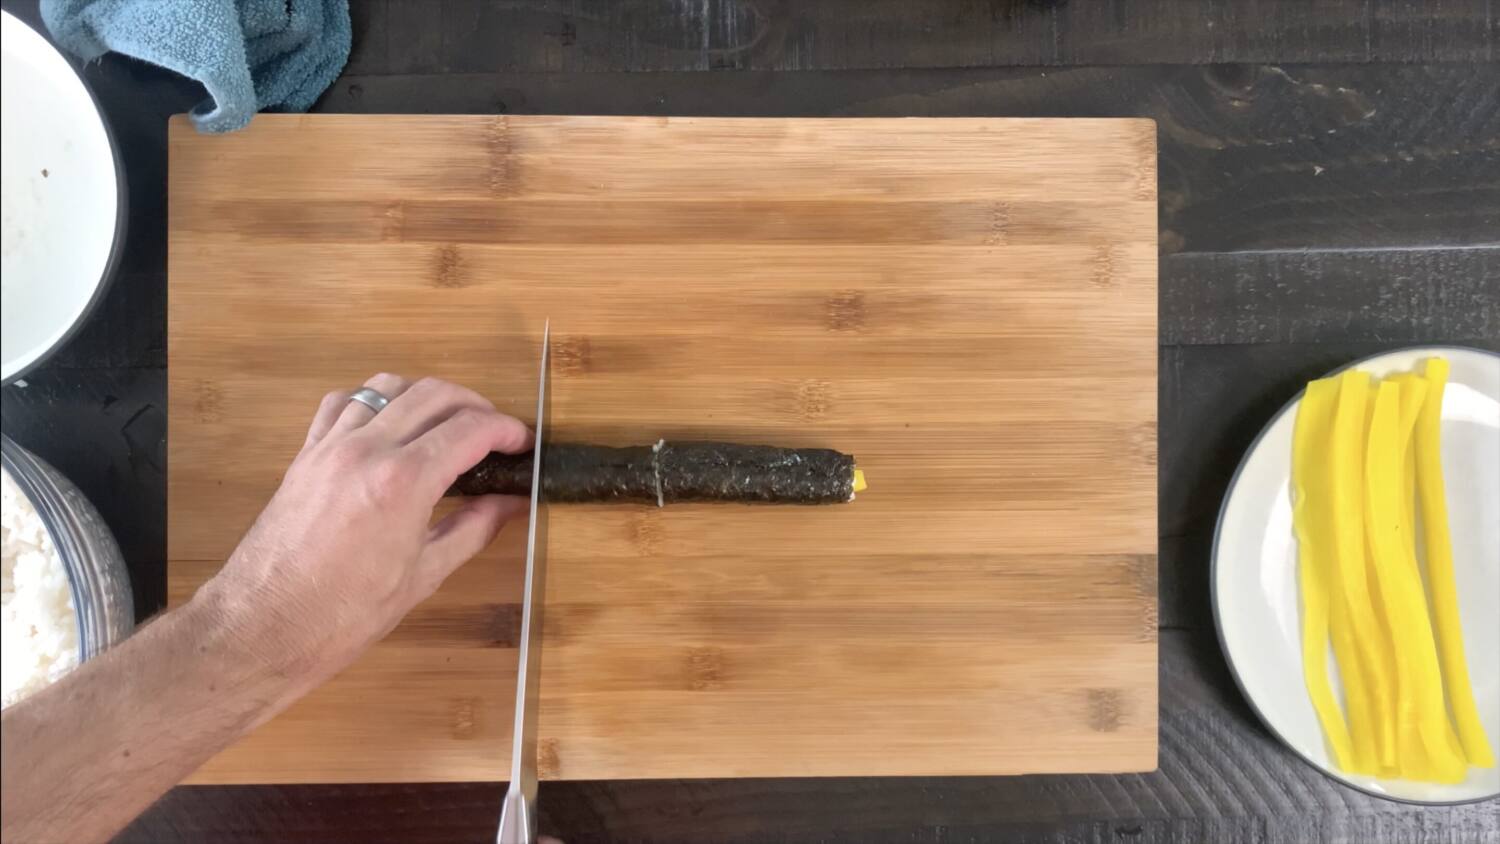
6. Cut the roll: Using a sharp knife, cut the roll into 8 pieces. I do this by first cutting the roll in half. Then cutting each half in half. Then cutting each fourth in half. Tip: Be sure to clean and wet the edge of your knife before cutting each roll.

7. Serve and enjoy: I usually serve with soy sauce and wasabi. Sushi rolls are traditionally served with pickled ginger as well.
Oshinko Roll Recipe


Oshinko Roll Recipe
Equipment
- 1 Bamboo Sushi Mat
- 1 Pot for cooking sushi rice
- 1 Sharp knife and cutting board
Ingredients
Sushi Rice
- 2/3 cups Sushi Rice dried, will cook to 2 cups
- 2 Tbsp. Sushi Vinegar
Sushi Roll
- 2 Nori Sheets
- 10 oz Oshinko (or yellow pickled radish) also referred to as takuan
Instructions
Cook Sushi Rice
- Rinse 2/3 cup of sushi rice by placing it in a colander and running water through it until the water is clear.
- After the rice is rinsed, add it to a sauce pan with 1 cup of water.
- Bring the water to a boil and then reduce the heat to low. Cover and let the rice simmer for 20 to 30 minutes, or until the water is absorbed and the rice is soft.
- Remove the rice and place into a bowl or dish and let cool. I would line the dish with parchment paper prior to adding the rice to avoid sticking.
- Mix 2 Tbsp. of sushi vinegar into your rice. Stir until it has absorbed into the rice. Once cooled and fully absorbed, your rice is ready to roll!
Assemble the Oshinko Rolls
- Cut the yellow pickled radish: Slice the yellow pickled radish into strips about 1/4 inch thick. If your radish is big enough, cut the strips so it will fit across the long half of your cut nori sheet. If it's not big enough, cut so it will fit approximately half way across the nori sheet. That way you can fit two across.
- Prepare your bamboo sushi mat: Cover your bamboo sushi mat with plastic wrap. This will help keep the rice from sticking to it.
- Tear or cut the nori sheet in half: Gently fold the nori sheet in half. Then tear the nori sheet in half along the crease. If it does not tear easily, use kitchen shears to cut in half.
- Press rice onto nori sheets: Next, place the nori sheet onto the plastic wrap with the shiny side facing down. Then press around 1/2 cup of rice onto about 3/4 of the nori sheet in an even layer. Leave about 1/4 of the nori sheet without rice as this will help seal the roll. Tip: Wet your hands prior to handling the sushi rice. This will prevent the rice from sticking to your hands.
- Add the yellow pickled radish to the rice: Place the yellow pickled radish onto the rice. If your slices are long enough to fit across the entire nori sheet, I would add three slices per nori sheet. If they are shorter, double up and put six slices on the nori sheet, trying to make it the same thickness across the roll.
- Roll the sushi: Wet the part of the nori sheet that does not contain rice. Starting at the side of the nori sheet with rice, use the bamboo sushi mat to fold your roll until it's completely enclosed. Once the nori is making contact with the rice, pull back the sushi mat so it doesn't get caught in the sushi. Still using the sushi mat as your guide, finish rolling until the roll is completely wrapped. Then wrap the sushi mat around the roll and gently press, tightening the roll together.Keep in mind that rolling sushi is an art that may take some practice so don’t get frustrated if it doesn’t look perfect your first time. It will get easier the more you do it.If you are struggling to roll the sushi, feel free use the whole nori sheet or 3/4 of the nori sheet. This will make the roll easier to roll but the roll will be thicker.
- Cut the roll: Using a sharp knife, cut the roll into 8 pieces. I do this by first cutting the roll in half. Then cutting each half in half. Then cutting each fourth in half. Tip: Be sure to clean and wet the edge of your knife before cutting each roll.
- Serve and enjoy: I usually serve with soy sauce and wasabi. Sushi rolls are traditionally served with pickled ginger as well.
Video
Notes
Nutrition
Frequently Asked Questions
What is Oshinko?
Oshinko is referred to in Japanese culture as pickled vegetables. The most common vegetable used in making Oshinko is the daikon radish. Yellow food coloring or turmeric is often added to the pickling solution to give Oshinko a bold yellow color.
Are Oshinko rolls vegan?
Yes, all the ingredients in Oshinko rolls are naturally vegan.
Is Oshinko gluten free?
Yes, all the ingredients in Oshinko rolls are naturally gluten free.
Final Thoughts on Oshinko Rolls
If you are looking for a refreshing sushi roll that is simple to make, the Oshinko roll is for you. Oshinko rolls are traditional Japanese rolls with a sweet and salty taste and bold yellow color that looks as good as it tastes. Though yellow pickled radishes may not be the easiest to find, once you have the ingredients gathered, Oshinko rolls are one of the easiest sushi rolls to make. We hope you enjoy this Oshinko roll recipe! Happy cooking!
For more great sushi articles check out below:
Delicious Dragon Roll Sushi Recipe
Delicious Philadelphia Roll Sushi Recipe
Also, for more great videos subscribe to our YouTube Channel.