

Named for its fun dragon-like appearance, the dragon roll is a tasty roll that provides a variety of flavors and textures. The savory flavor of the shrimp tempura combined with the avocado make this one of my favorite rolls. In my opinion, unagi sauce is a must for this roll as its sweet flavor complements the rich flavors of the rest of the roll.
Though this roll can look a little intimidating to make, fear not as we will walk you through how to prepare this fun and delicious roll step-by-step.
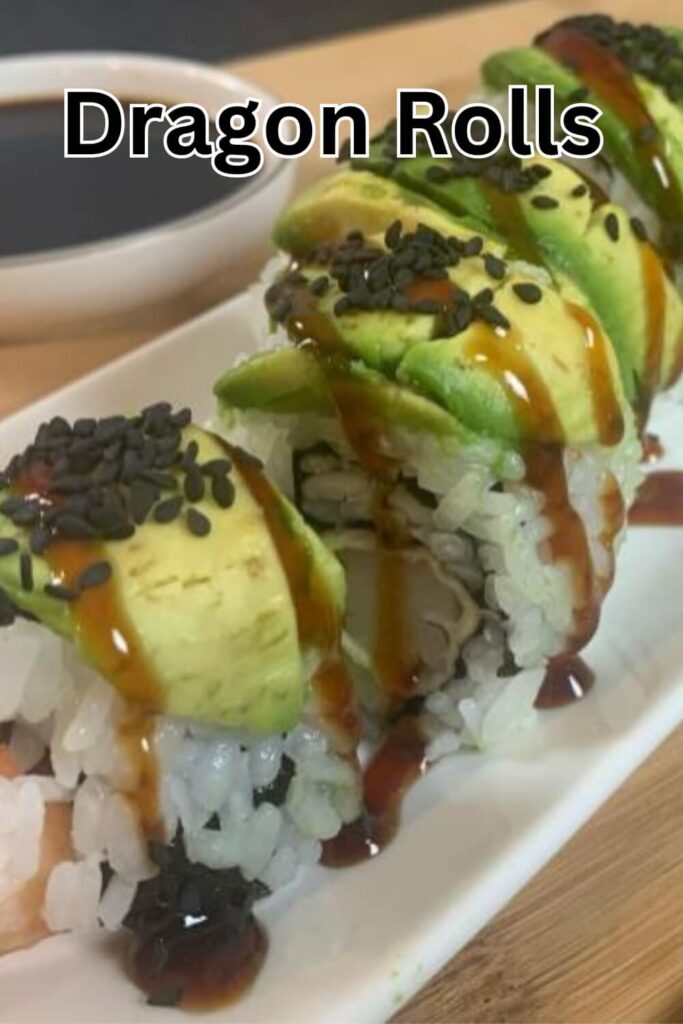

Table of Contents
What is a Dragon Roll?
The Dragon roll is typically prepared as an uramaki sushi roll (inside-out roll), meaning the rice is on the outside of the nori (seaweed) wrapper and the fillings are on the inside. However, the sliced avocado (or sometimes eel) that tops each roll is what make the dragon roll unique and give it a dragon-like appearance.
While many dragon roll recipes (including my own) include shrimp tempura as the primary protein, thus merging two Japanese cooking styles (tempura and sushi), the roll is a Western creation and not a traditional Japanese roll.
What’s in a Dragon Roll?
While the ingredients used to make a dragon rolls vary from chef to chef, the most common ingredients are sushi rice, a nori sheet, shrimp tempura, avocado, and cucumber. Some also add tobiko, an orange fish roe, to the filling to give it a slightly salty flavor and colorful appearance.
Sliced avocado is the most common topping (and my preferred topping for dragon rolls), though sliced eel can also be used. Some chefs prefer using both, placing the eel on top of the avocado.
Dragon rolls are often garnished with spicy mayo and sriracha dots on top of the avocado to give the roll a more colorful and fun presentation. I prefer to lightly sprinkle sesame seeds over the avocado and drizzle unagi (eel) sauce over the top of the roll to bring all the flavors together.
For a great unagi sauce recipe, check out the following article: Easy and Delicious Unagi Sauce (Eel Sauce) Recipe
How to Control the Thickness of Your Sushi Roll

You can control how thick your sushi rolls are by how much of the nori sheet you use. This recipe uses the entire nori sheet, which makes thicker rolls. If you like smaller rolls, you can cut the nori sheet in half. This will definitely make the roll thinner and easier to eat with chopsticks, but it can be trickier to roll. You can also cut off the top 1/4 of the nori sheet to reduce the thickness of the roll depending on your preference.
How to Make a Dragon Roll?
The first step in preparing dragon rolls is to cook the sushi rice and the tempura shrimp. Then gather and cut all the ingredients so they will fit nicely in the roll. Next you press the rice onto the nori sheet, add the ingredients to the nori sheet, roll your sushi and cut the roll. I like to cut my sushi rolls into eight pieces but this can vary anywhere from six to ten.
Finally, add any extra toppings, garnishments and sauces once you have your roll cut.
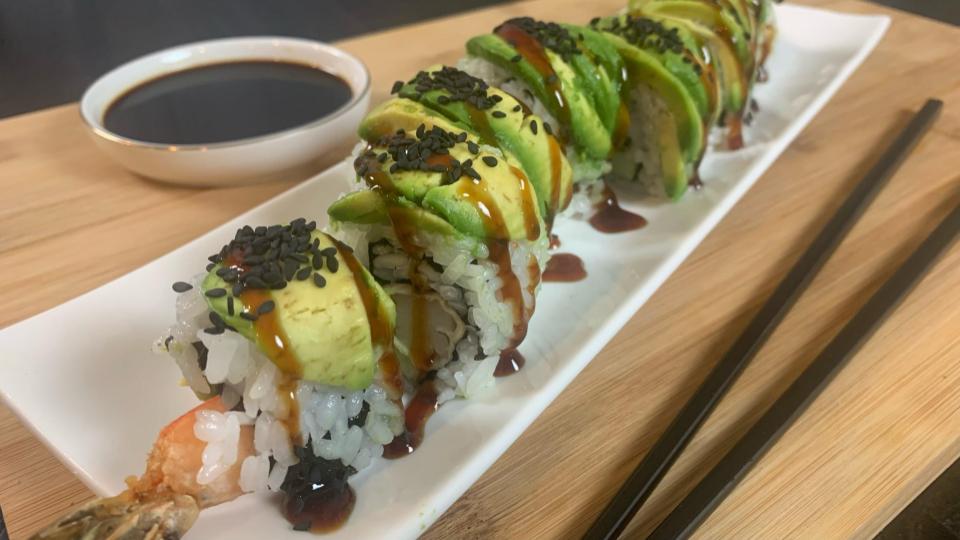
I then usually offset the sushi pieces of the roll for presentation purposes. I serve with wasabi and soy sauce. Most sushi restaurants will also serve with pickled ginger as well.
Please see below for step-by-step instructions on how to prepare a dragon roll:
Cook Sushi Rice
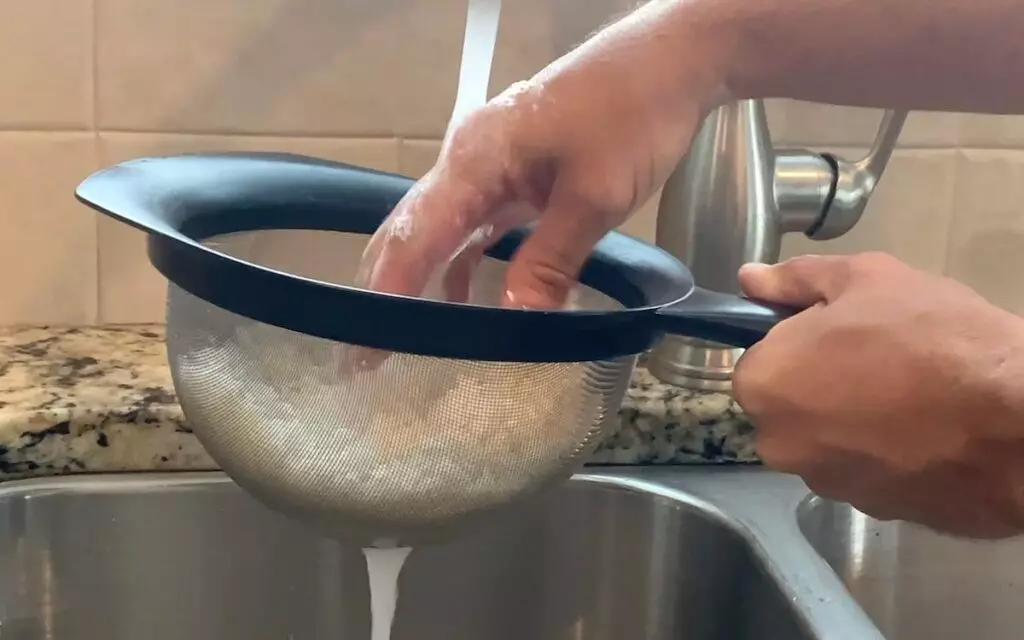
1. Rinse 1 1/3 cups of sushi rice by placing it in a colander and running water through the rice until the water is clear.

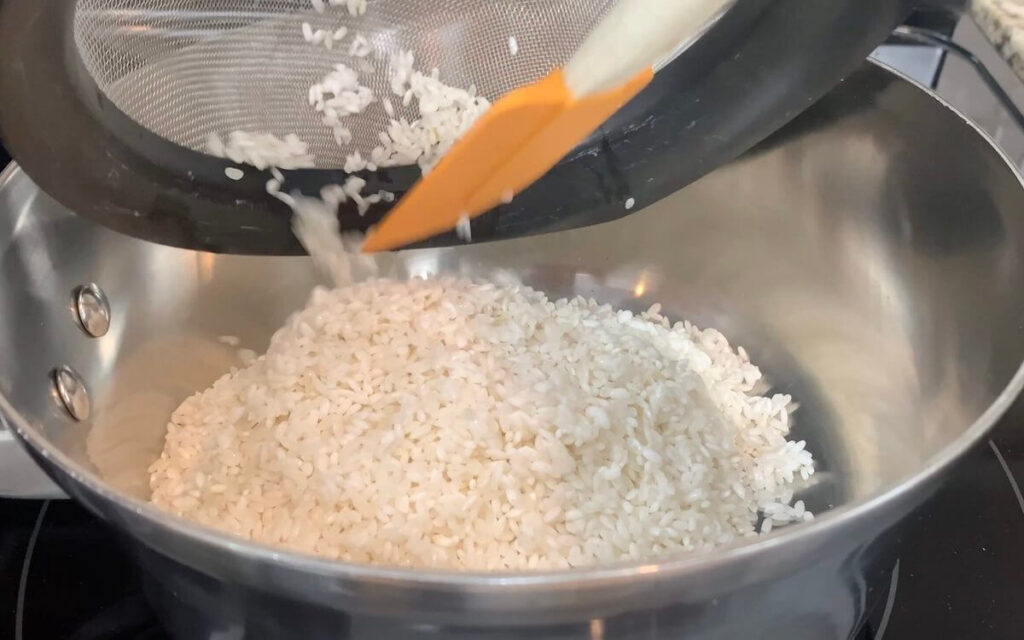
2. After the rice is rinsed, add it to a sauce pan with 1 2/3 cups of water.

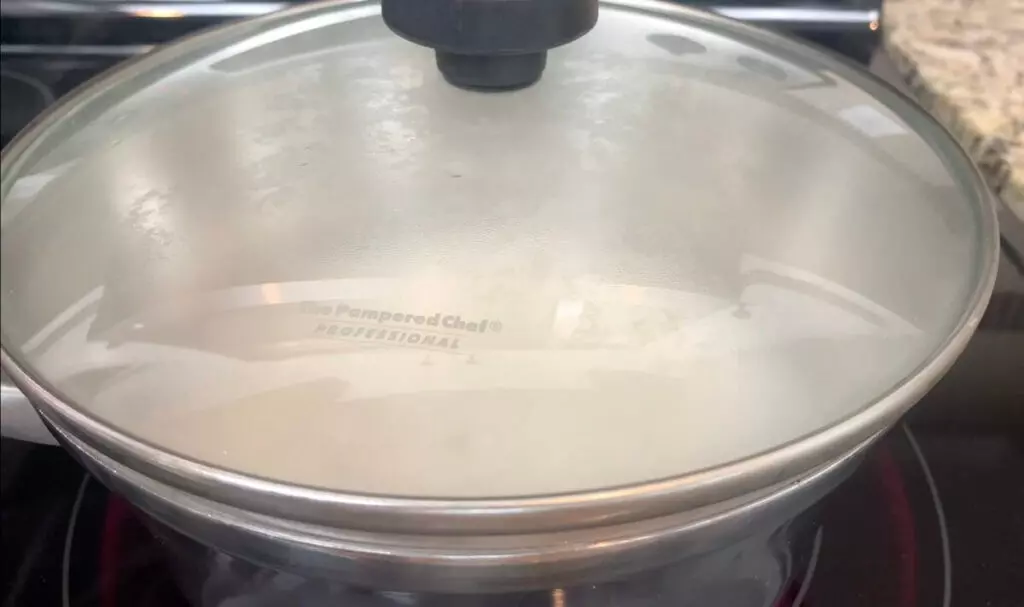
3. Bring the water to a boil and then reduce the heat to low. Cover and let the rice simmer for 20 to 30 minutes, or until the water is absorbed and the rice is soft.

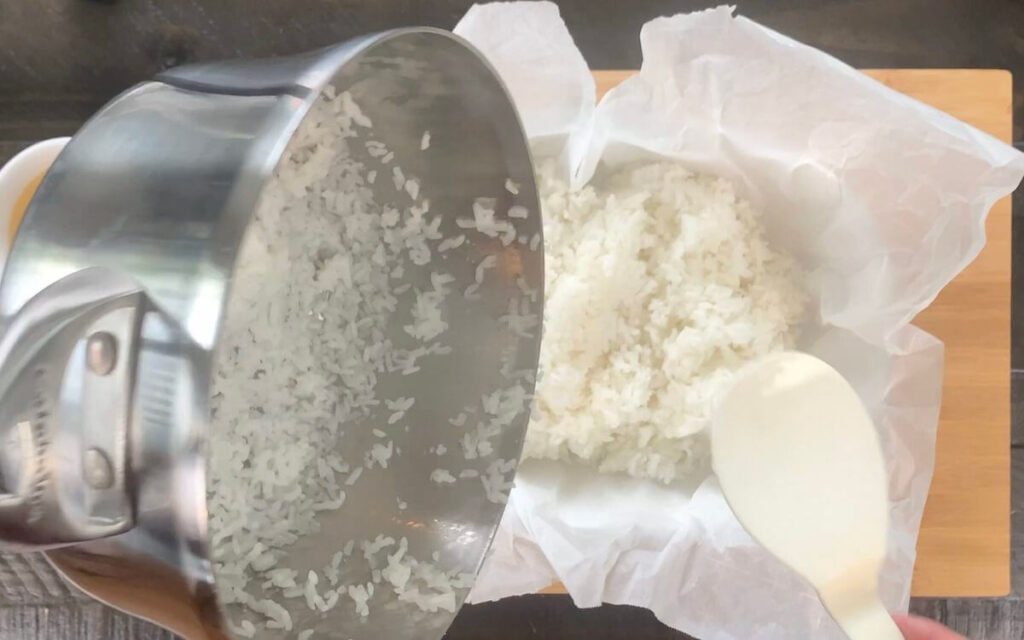
4. Remove the rice and place into a bowl or dish. I would line the dish with parchment paper prior to adding the rice to avoid the rice sticking to the bowl.

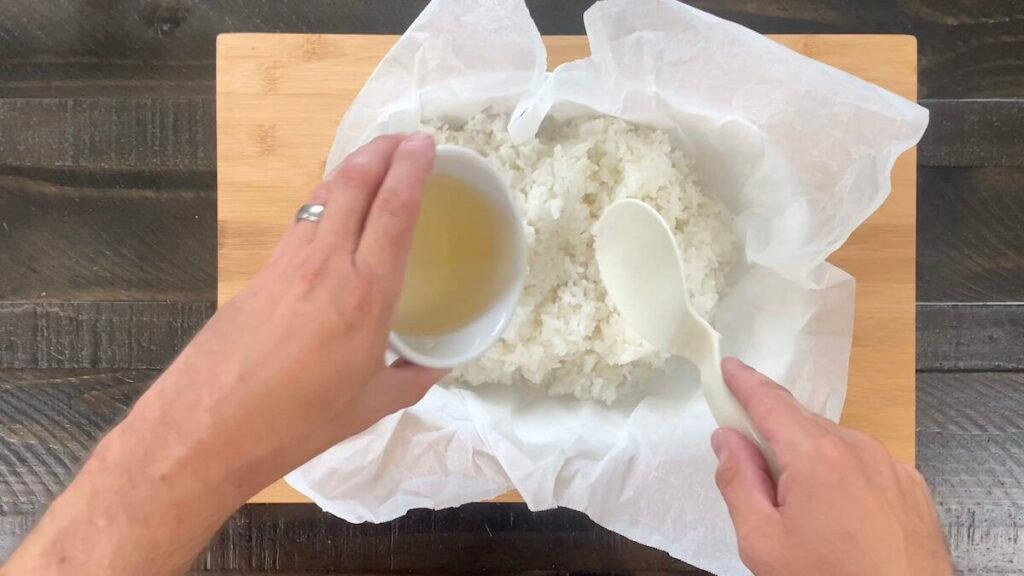
5. Mix 1/4 cup of sushi vinegar into your rice. Stir until it has absorbed into the rice. Once cooled and fully absorbed, your rice is ready to roll!

Check out the following article for a more in depth look at how to prepare sushi rice: Sushi Rice: Easy Sushi Rice Recipe.
Prepare Shrimp for Tempura
1. In a pan, heat 6 cups of vegetable oil on medium heat to 350 degrees.
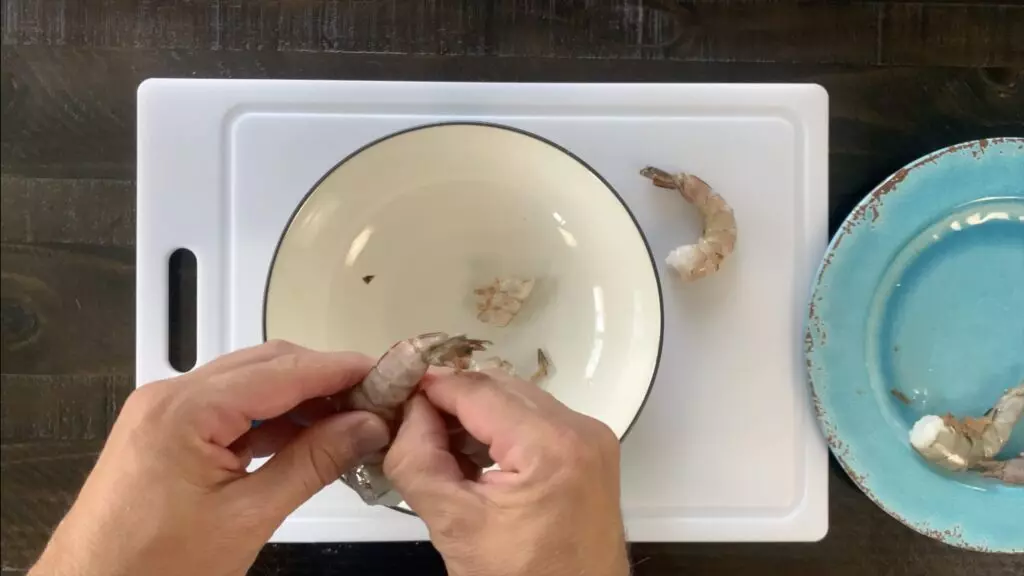
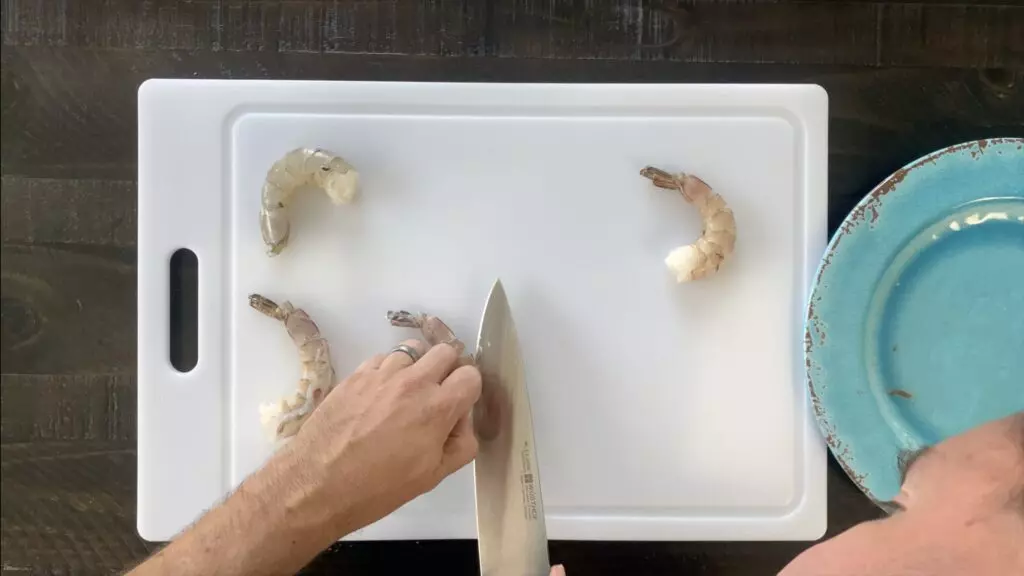
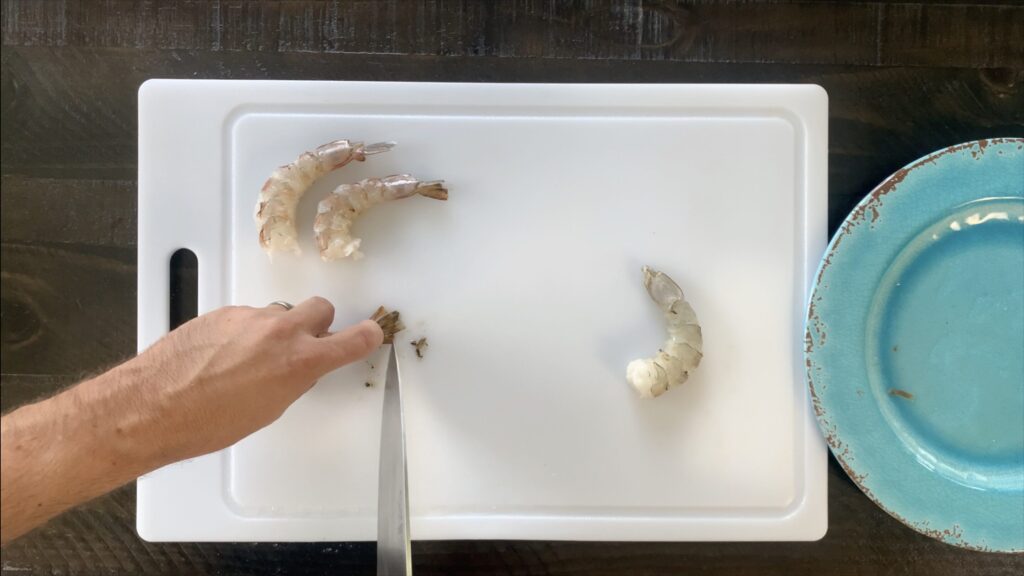
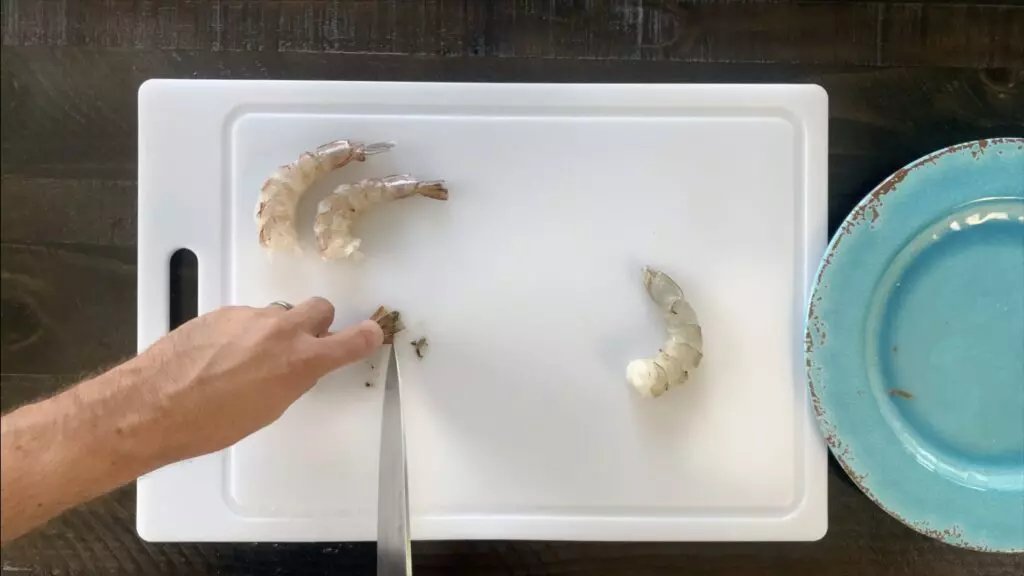
2. Remove shells from shrimp, leaving the tails on. Remove the spiky part of the tail closest to the back as that can pop when frying.

3. Devein the shrimp. You can do this by using a sharp knife to cut along the back of the shrimp about 1/4 of the way through to expose the vein. Once exposed, remove the vein.

4. Use your knife to scrape the black liquid out of the tail. This can also cause the shrimp to pop during frying. Rinse thoroughly and dry with a paper towel.
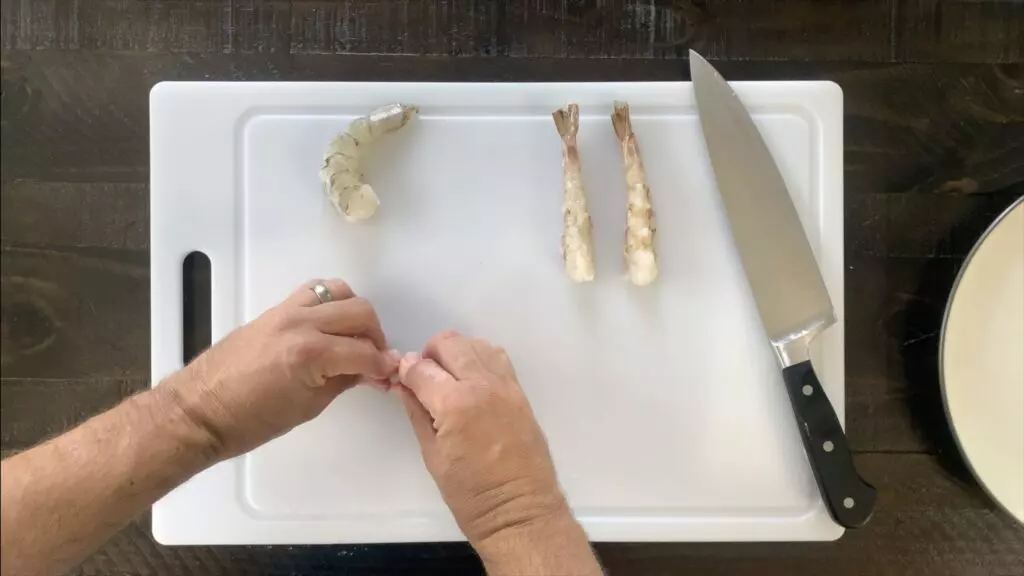
5. Stretch the shrimp. You can do this by using a sharp knife to score along the belly of shrimp from the head to the tail. Then use your fingers to press the shrimp against the cutting board, straightening the shrimp. You should hear cracking as you push down.

Prepare Tempura Batter and Cook the Shrimp Tempura
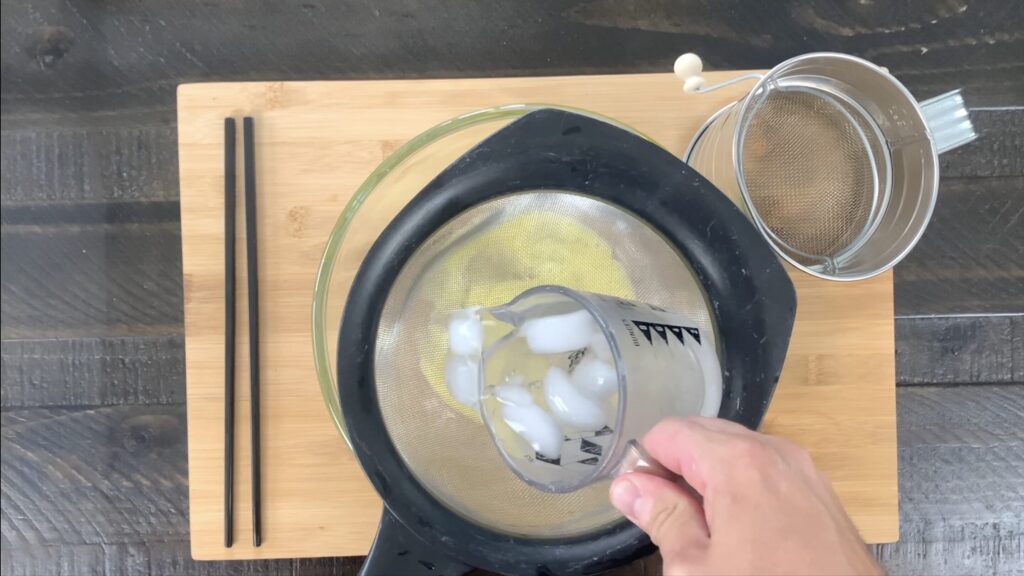
1. Assemble the ingredients of your batter and chill the water. You may need to add ice if you don’t have access to very cold water. However, make sure to remove ice cubes before combining with egg. I use a strainer for this.
2. Crack the egg into a mixing bowl and beat until the yolk and white are combined.

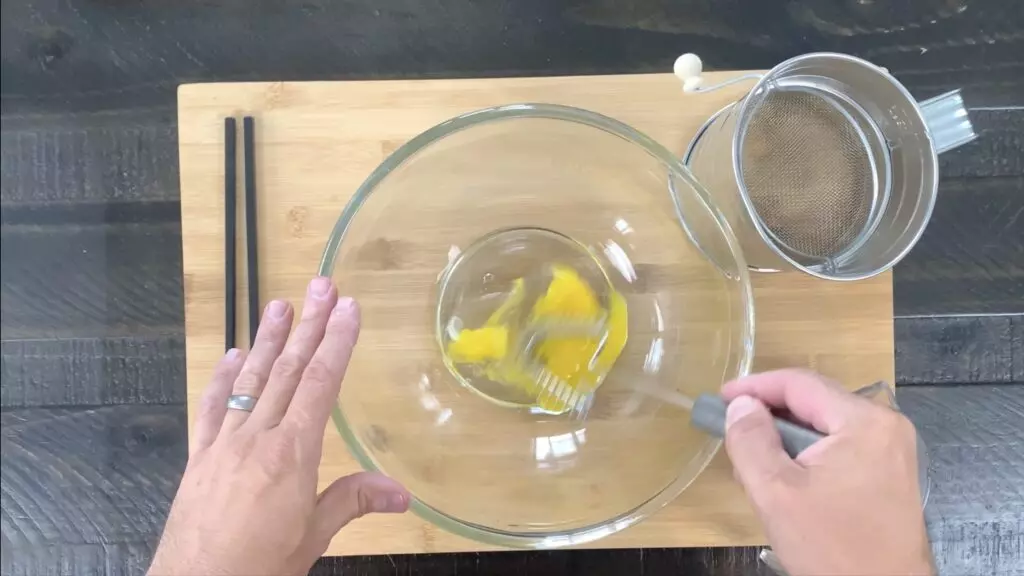
3. Add cold water to the egg and mix well.

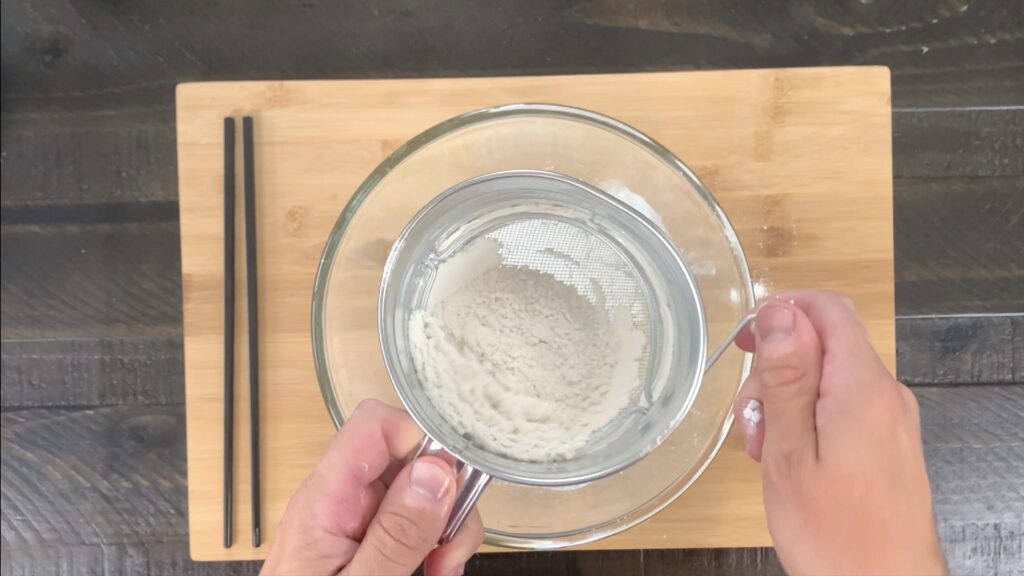
4. Add one cup of sifted flour to the egg and water combination. I usually sift the flour directly into the bowl to ensure the flour is fluffy.

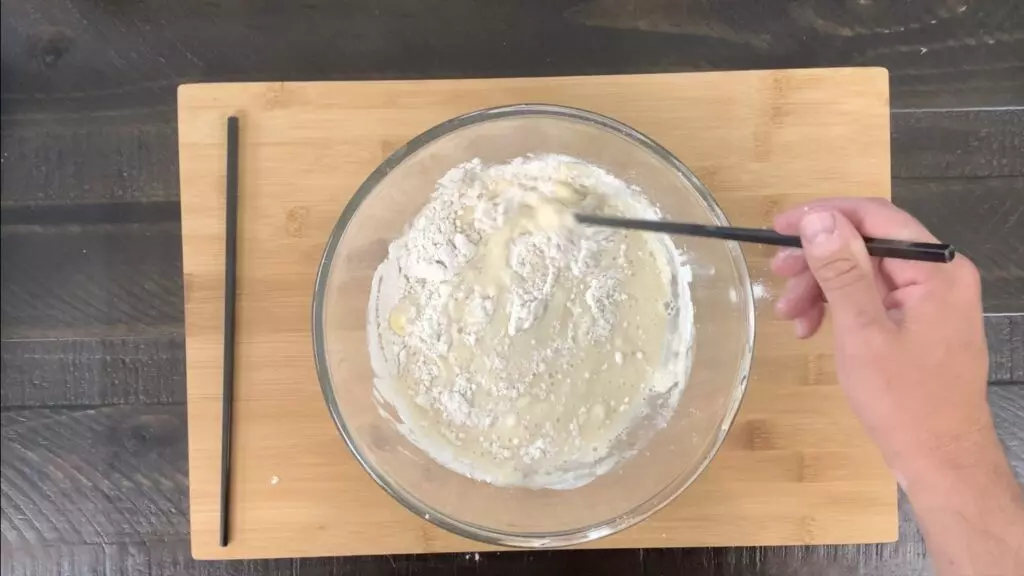
5. Using a spoon or chopstick, lightly mix the batter making sure not to over stir. The batter should be mixed but a little lumpy.

6. Put the remaining cup of flour into a bowl and dip the shrimp into a bowl of flour making sure the entire piece of shrimp is coated in flour. This helps the batter to stick to the flour.
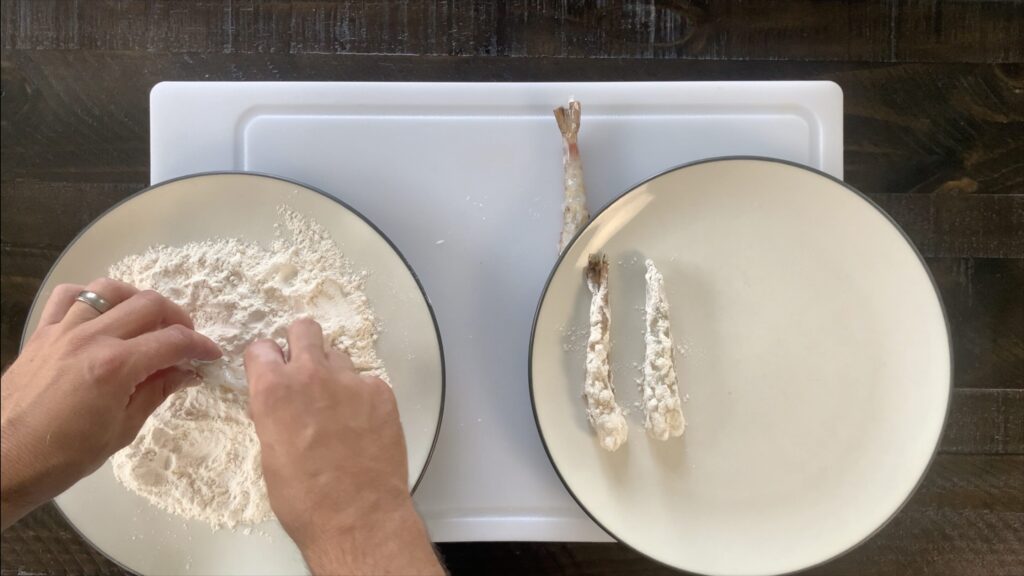
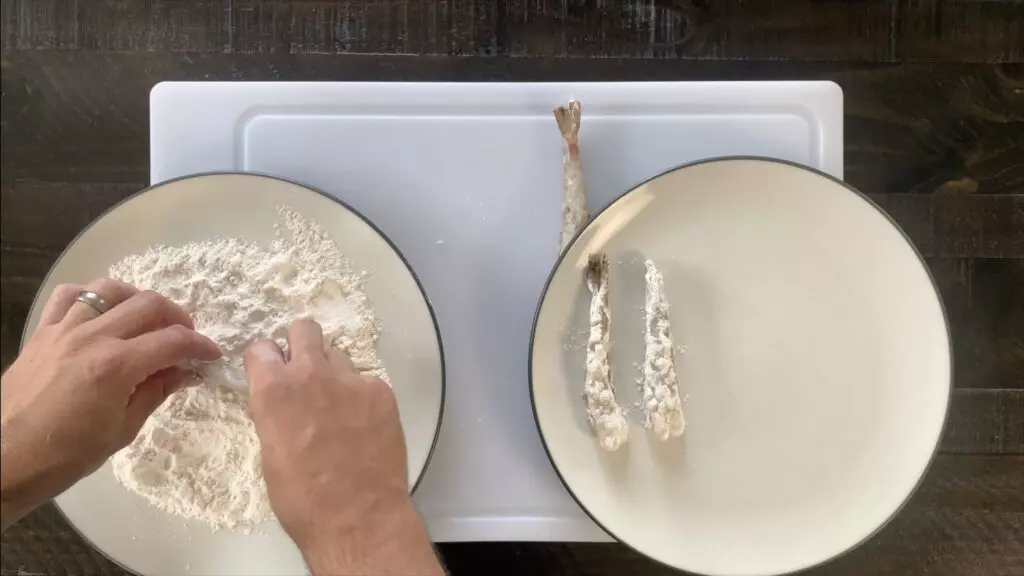
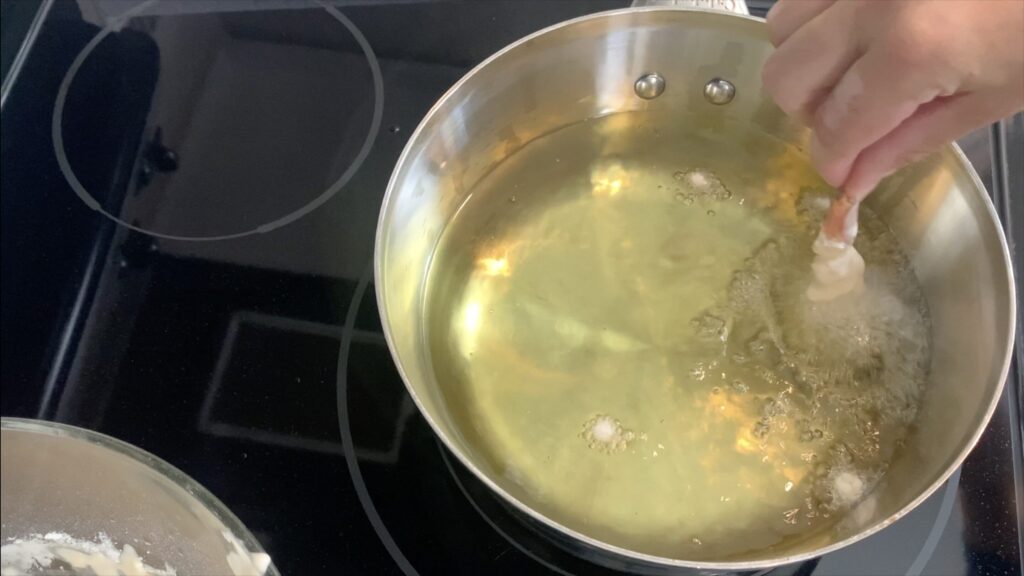
7. Holding by the tail, dip each shrimp into the batter ensuring the piece is evenly coated. Then gently drop the shrimp into the vegetable oil, cooking for around two minutes, or until the batter is golden brown and the shrimp is cooked through. Once done, place on a plate covered with two or three paper towels to help soak up any excess oil. Repeat this process for all shrimp.

8. Discard the remaining oil when complete.
Assemble the Dragon Rolls
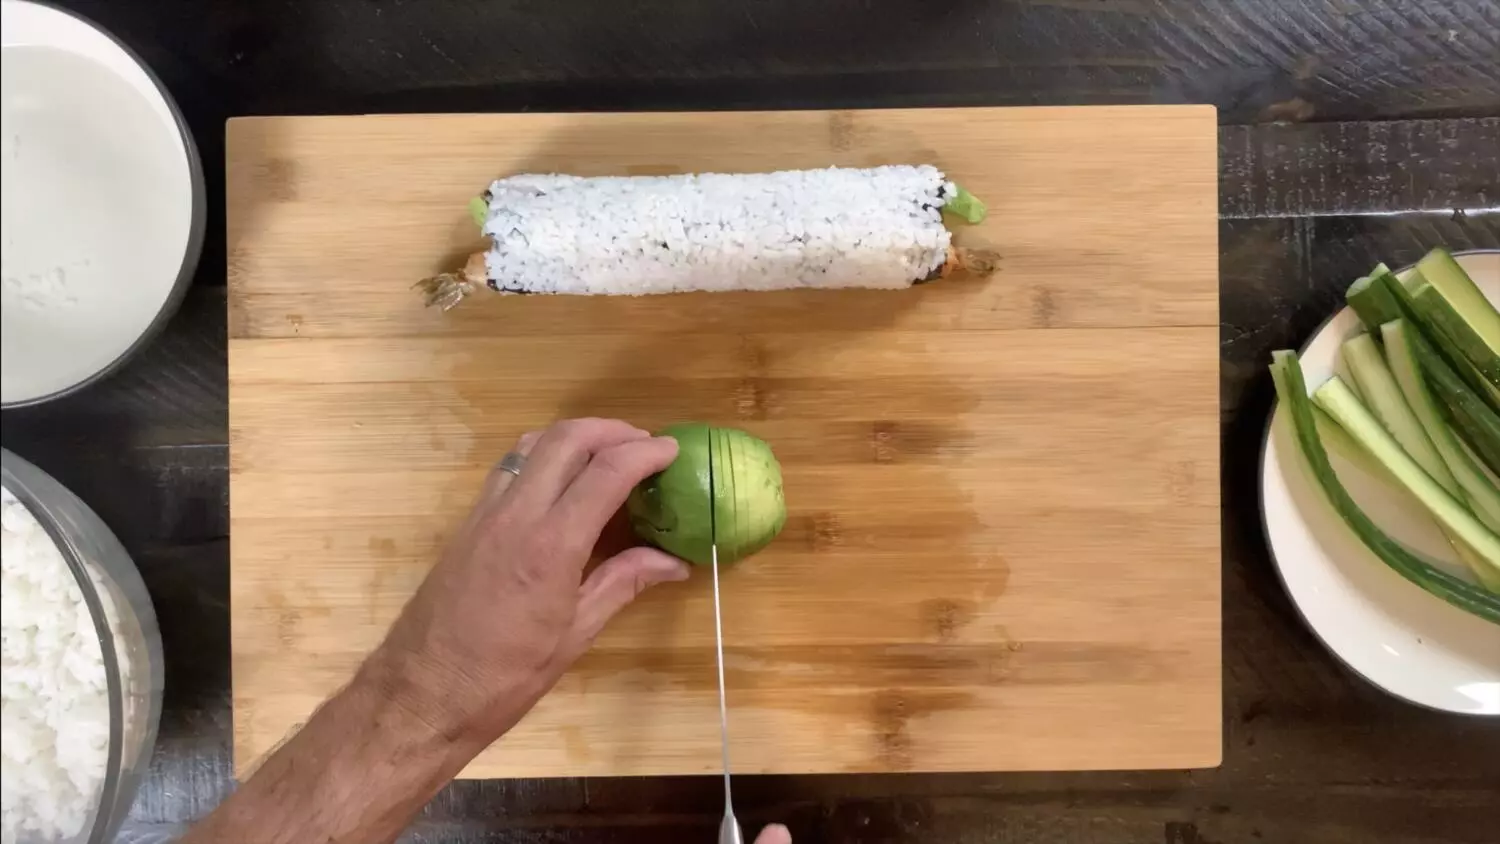
1. Cut the first avocado: Slice the first avocado in half the long way. Remove the seed and cut each half into 6 slices. Each whole avocado should yield around 12 slices. I would also drizzle lemon juice over the avocado after cutting to prevent it from browning in your sushi roll.
2. Cut the cucumber: Cut the cucumbers into strips that are as long as your nori sheet and about 1/8 inch thick.
3. Prepare your bamboo sushi mat: Cover your bamboo sushi mat with plastic wrap. This will help keep the rice from sticking to it.
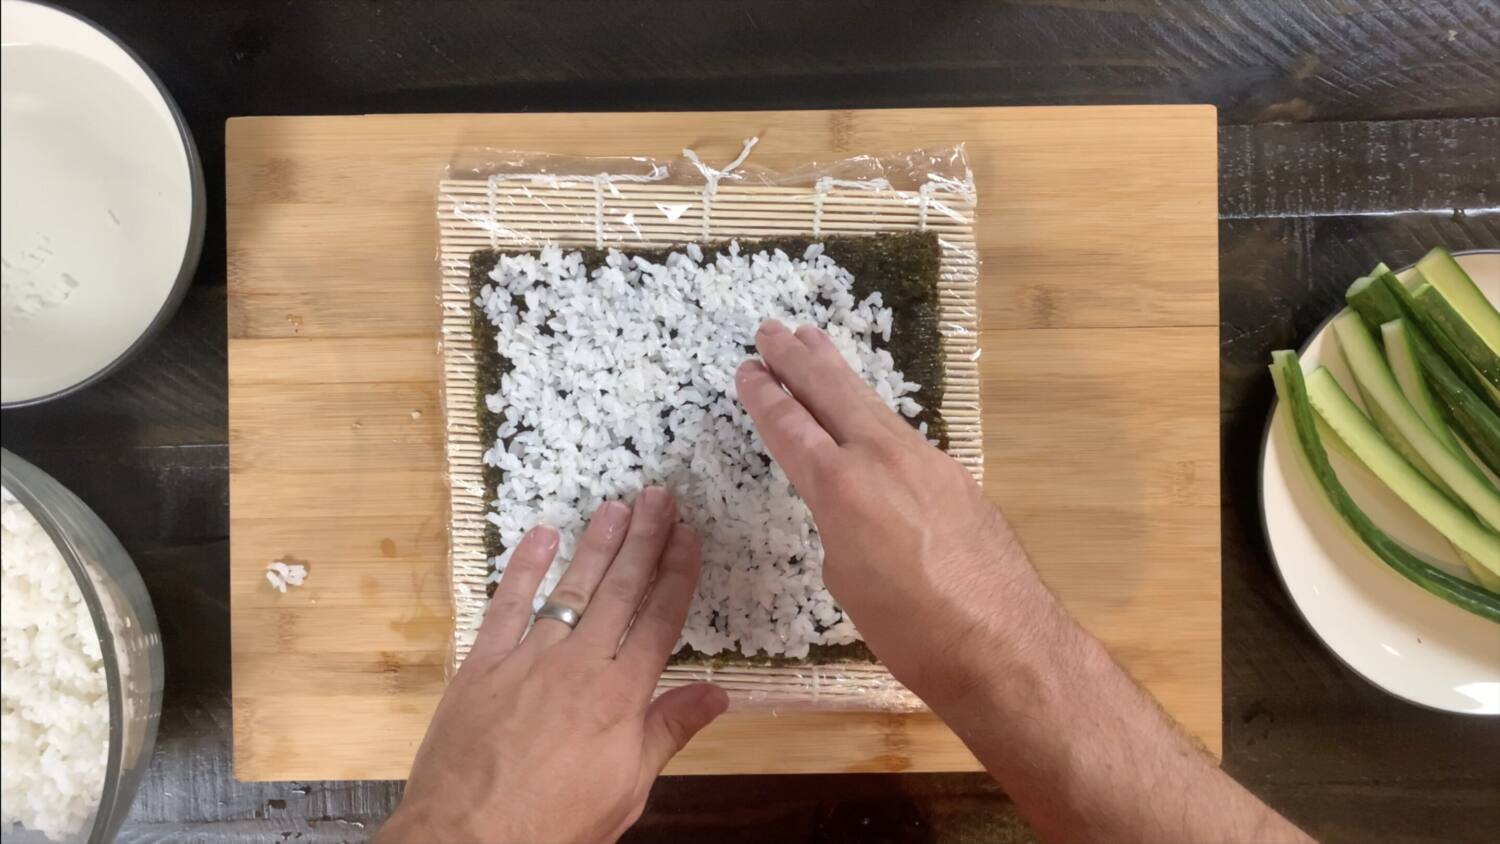
4. Press rice onto nori sheets: Next, place the nori sheet onto the plastic wrap with the shiny side facing down. Then press around 1 cup of rice onto the nori sheet in an even layer. Tip: Wet your hands in a bowl of water mixed with a splash of rice vinegar prior to handling the sushi rice. This will prevent the rice from sticking to your hands.

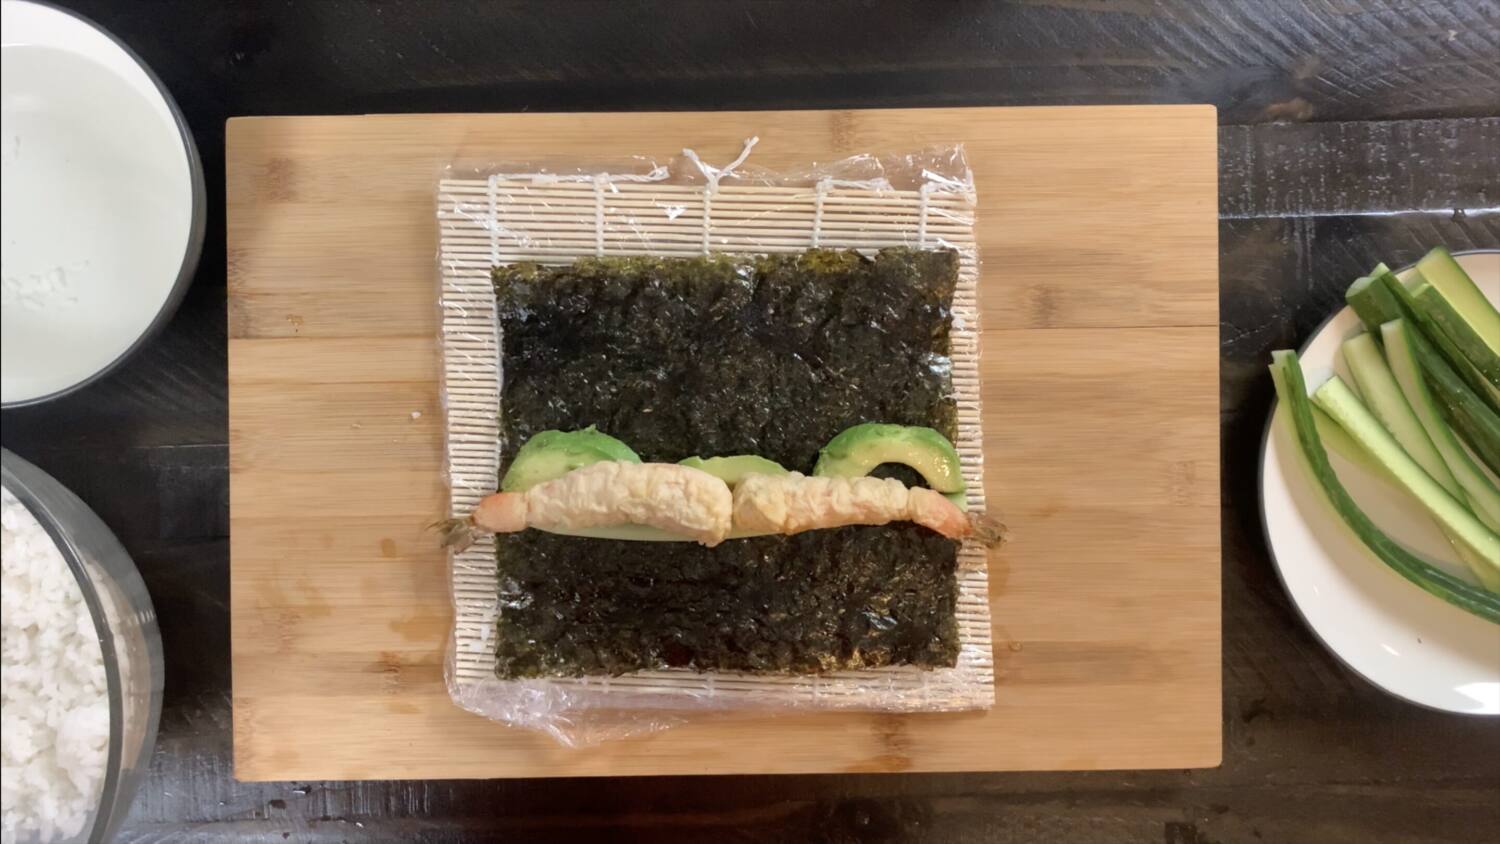
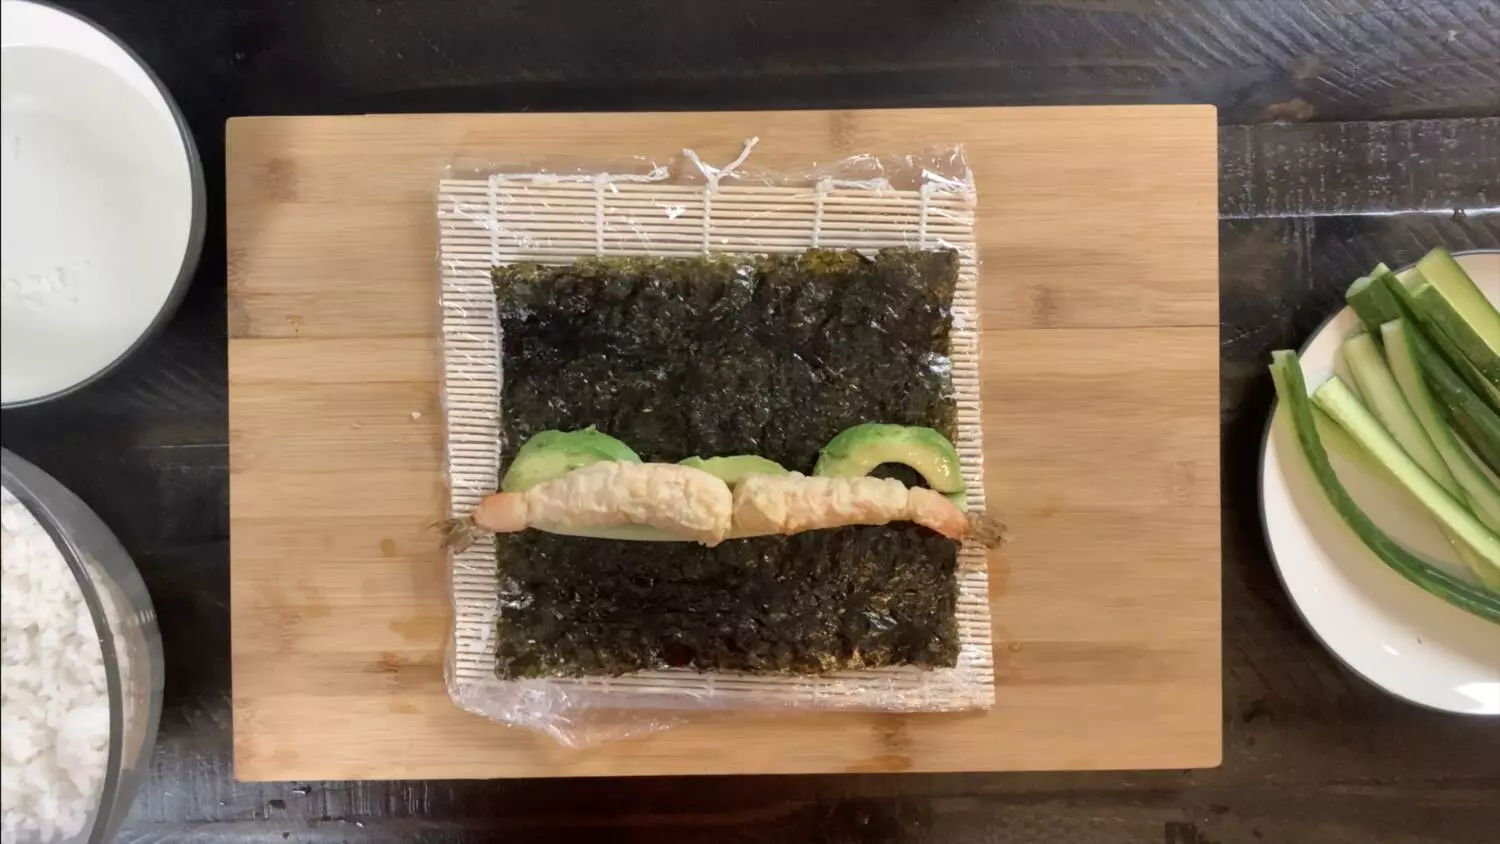
5. Add the avocado and cucumber: Add the avocado slices and cucumber sticks horizontally along the nori sheet. In general, I add 2-3 avocado slices and 1-2 cucumber sticks depending on the size of each ingredient and how everything fits.
6. Add the shrimp: Add two pieces of shrimp to the middle of the roll with the tails sticking out of each end.
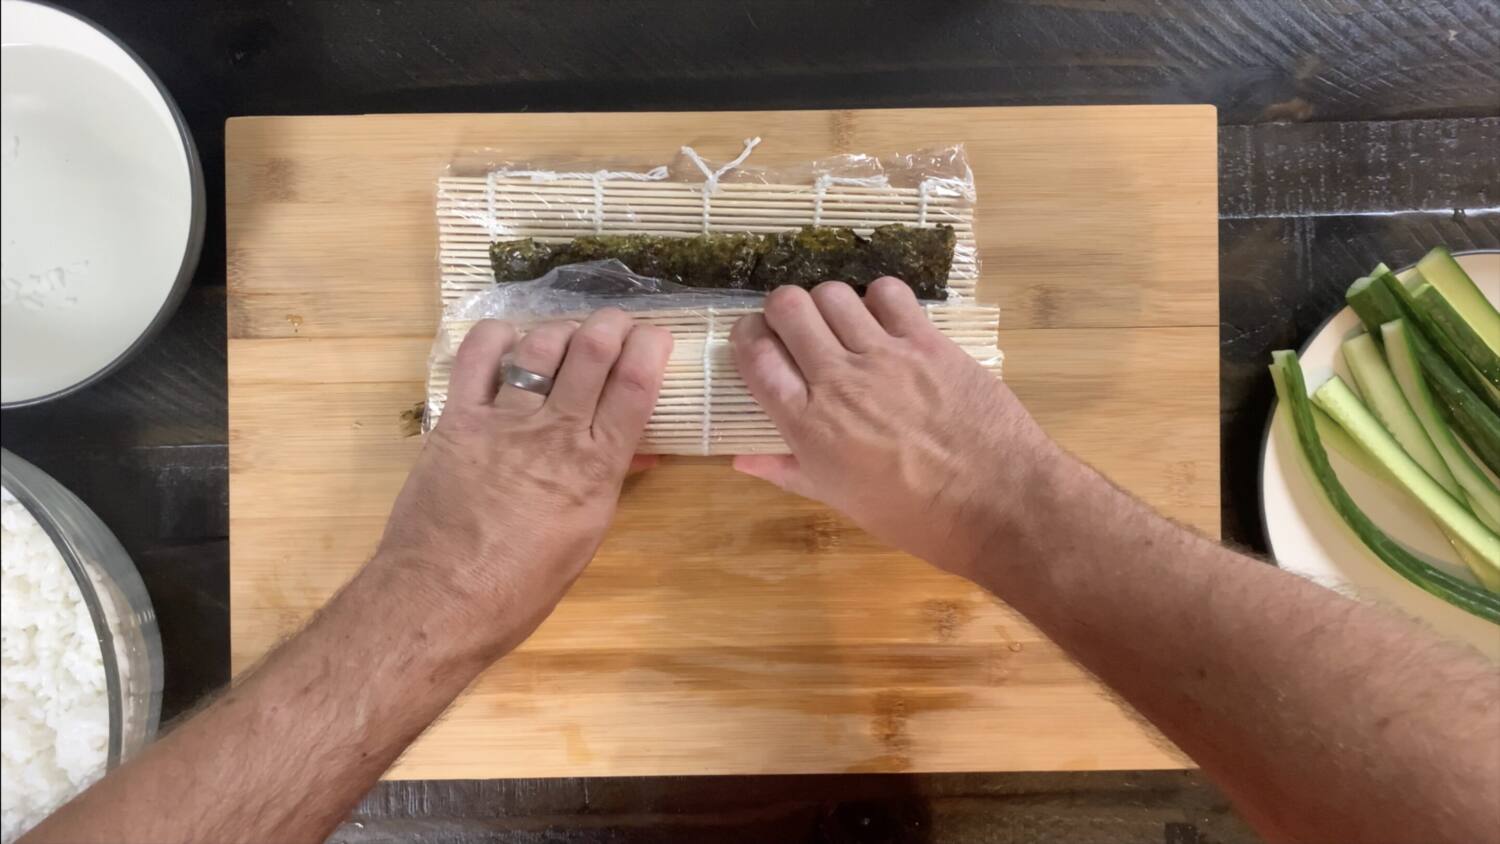
7. Roll the sushi: Use the bamboo sushi mat to fold your roll until it’s completely enclosed. Once the rice is making contact with the nori roll, pull back the sushi mat so it doesn’t get caught in the roll. Still using the sushi mat as your guide, finish rolling until it’s completely wrapped. Then wrap the sushi mat around the roll and gently tighten the roll together. Keep in mind that rolling sushi is an art that may take some practice so don’t get frustrated if it doesn’t look perfect your first time. It will get easier the more you do it.

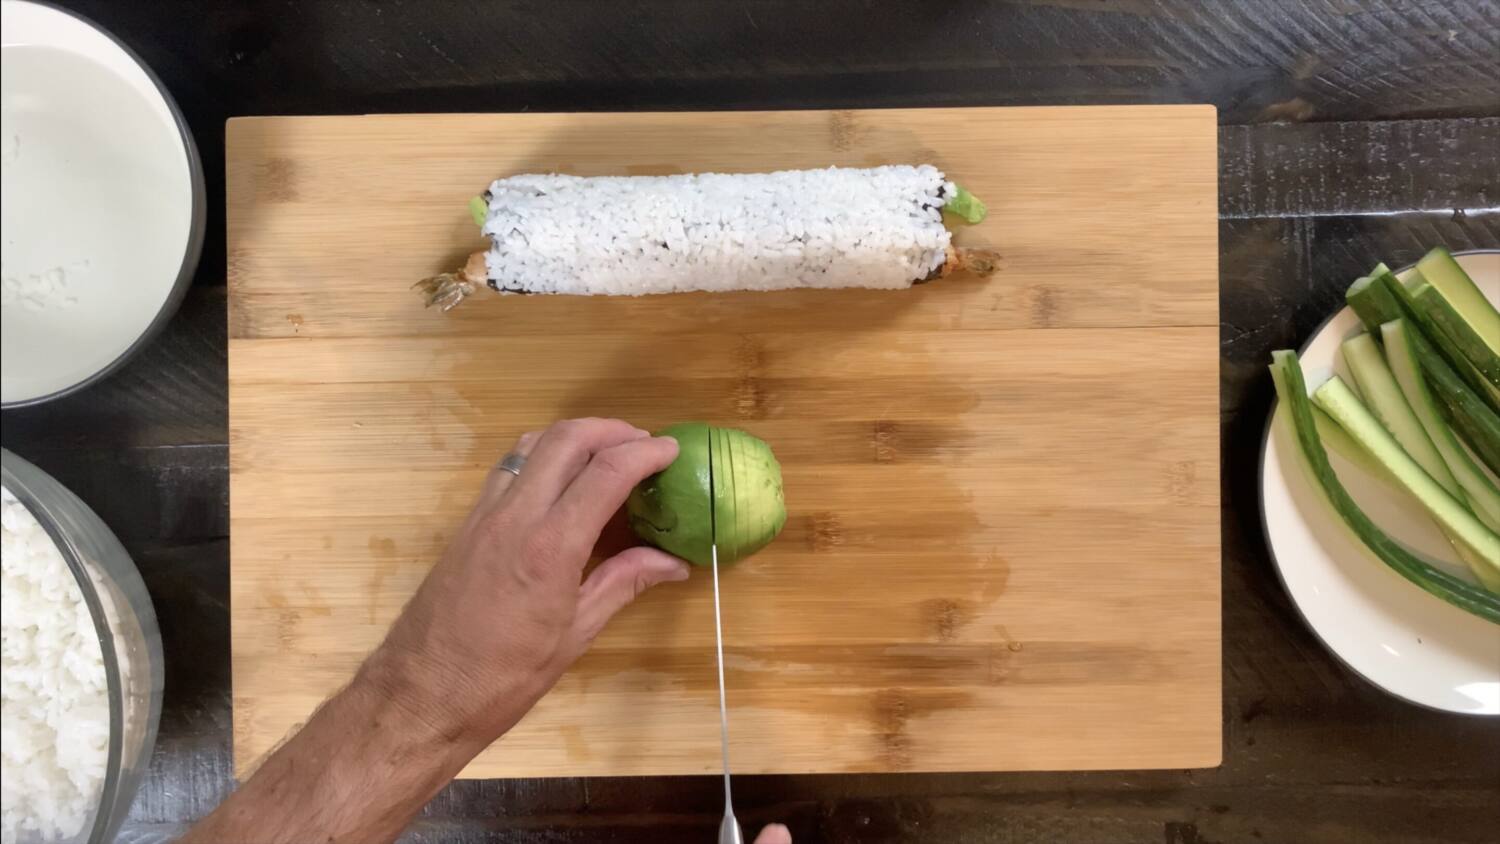
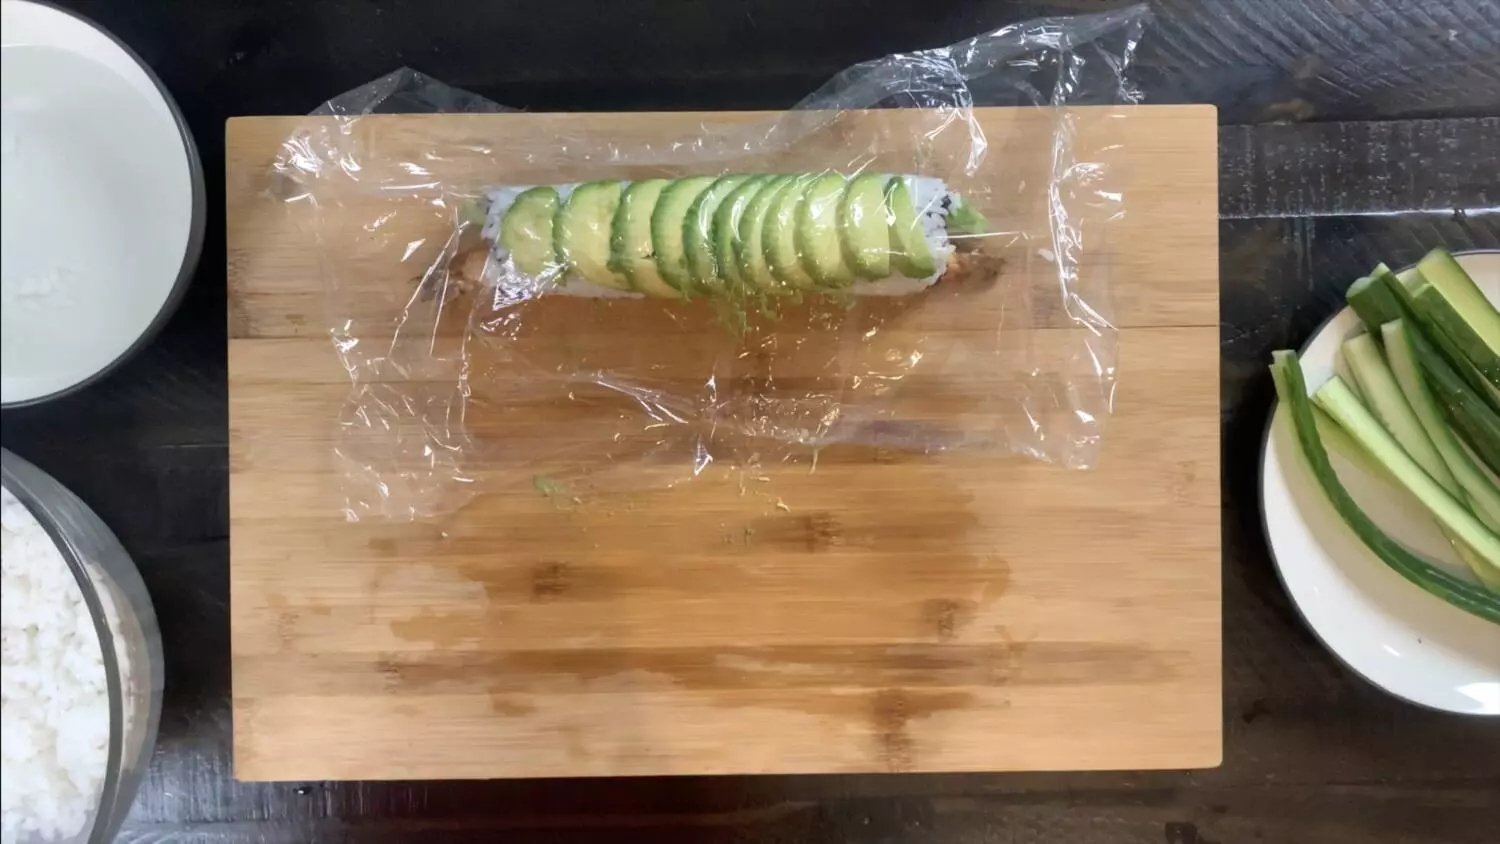
8. Cut the remaining avocado and place on top of the roll: The remaining 2 avocados need to be sliced thinly to be added to the top of each roll. To do this, cut in half the long way and remove the skin and seed. Then cut each half into thin slices going the short way of the avocado. Cut the slices as thin as you can or around 1-2 millimeters thick. Once cut, use your hand to gently push the avocados to the side so they fold over on top of each other. Then place all the slices of one half of the avocado on top of your roll. I would also drizzle lemon juice over the avocado after cutting to prevent it from browning in your sushi roll.
9. Use the bamboo sushi mat to press the avocado slices onto the roll: Since the avocado slices have a tendency to come apart, I would suggest covering the roll in plastic wrap first. Then wrap the sushi mat around the roll and firmly press the mat onto the roll, forming the avocado slices to the top of the roll. Leave the plastic wrap on the roll for cutting.

10. Cut the roll: Using a sharp knife, cut the roll into 8 pieces through the plastic wrap. I do this by first cutting the roll in half. Then cutting each half in half. Then cutting each fourth in half. This should give you 8 pieces that are equal size. Once done cutting, remove the plastic from each of the pieces. Tip: Be sure to clean and wet the edge of your knife before cutting each roll. This will prevent the roll from sticking to your knife.


11. Optional: Lightly sprinkle sesame seeds over the top of the avocado.
12. Optional: Lightly drizzle with unagi (eel) sauce over the top of the avocado.
13. Serve and enjoy: I usually serve with soy sauce and wasabi. Sushi rolls are traditionally served with pickled ginger as well.
Dragon Roll Recipe


Dragon Roll Recipe
Equipment
- 1 Bamboo Sushi Mat
- 1 Pot for cooking sushi rice
- 1 Pot for frying tempura batter
- 1 Sharp knife and cutting board
Ingredients
Sushi Rice
- 1 1/3 cups Sushi Rice dried, will cook to 4 cups
- 4 cup Sushi Vinegar
Tempura Batter
- 6 cups Vegetable oil
- 2 cups All purpose flour
- 1 Egg Large
- 1 cup Water Ice cold
Roll and Filling
- 4 Nori Sheets
- 3 Ripe Avocados
- 1 English Cucumber Sliced into 1/8 sticks
- 8 Pieces Shrimp Size – 13 to 15 per pound
- Lemon Juice
- Unagi (eel) sauce
- Sesame seeds
Instructions
Cook Sushi Rice
- Rinse 1 1/3 cups of sushi rice by placing it in a colander and running water through it until the water is clear.
- After the rice is rinsed, add it to a sauce pan with 1 2/3 cups of water.
- Bring the water to a boil and then reduce the heat to low. Cover and let the rice simmer for 20 to 30 minutes, or until the water is absorbed and the rice is soft.
- Remove the rice and place into a bowl or dish. I would line the dish with parchment paper prior to adding the rice to avoid sticking.
- Mix 1/4 cup of sushi vinegar into your rice. Stir until it has absorbed into the rice. Once cooled and fully absorbed, your rice is ready to roll!
Prepare shrimp
- In a sauce pan, heat 6 cups of vegetable oil on medium heat to 350 degrees.
- Remove shells from shrimp, leaving the tails on. Remove the spiky part of the tail closest to the back as that can pop when frying.
- Devein the shrimp. You can do this by using a sharp knife to cut along the back of the shrimp about 1/4 of the way through to expose the vein. Once exposed, remove the vein.
- Use your knife to scrape the black liquid out of the tail. This can also cause the shrimp to pop during frying.
- Rinse thoroughly and dry with a paper towel.
- Stretch the shrimp. You can do this by using a sharp knife to make shallow cuts along the belly of shrimp from the head to the tail. Then use your fingers to press the shrimp against the cutting board, straightening the shrimp. You should hear cracking as you press down.
- Put the remaining cup of flour into a plate or small bowl and dip the shrimp into a bowl of flour making sure the entire piece of shrimp is coated in flour. This helps the batter to stick to the flour.
Prepare Tempura Batter and cook the shrimp
- Assemble the ingredients and chill the water. You may need to add ice if you don't have access to very cold water. However, make sure to remove ice cubes before combining with egg. I use a strainer for this.
- Crack the egg into a mixing bowl and beat until the yolk and white are combined.
- Add cold water to the egg and mix well.
- Add one cup of sifted flour to the egg and water combination. I usually sift the flour directly into the bowl to ensure the flour is fluffy.
- Using a spoon or chopstick, lightly mix making sure not to over stir. The batter should be mixed but a little lumpy.
- Holding by the tail, dip each piece of shrimp into the batter ensuring the piece is evenly coated. Then gently drop the batter into the vegetable oil, cooking for around two minutes, or until the batter is golden brown and the shrimp is cooked through. Once done, place on a plate covered with two or three paper towels to help soak up any excess oil. Repeat this process for all shrimp.
- Discard the remaining oil when complete.
Assemble the Dragon Rolls
- Cut the first two avocados: Slice the first avocado in half the long way. Remove the seed and cut each half into 6 slices. The whole avocado should yield around 12 slices.I would also drizzle lemon juice over the avocado after cutting to prevent it from browning in your sushi roll.
- Cut the cucumber: Cut the cucumbers into strips that are as long as your nori sheet and about 1/8 inch thick.
- Prepare your bamboo sushi mat: Cover your bamboo sushi mat with plastic wrap. This will help keep the rice from sticking to it.
- Press rice onto nori sheets: Next, place the nori sheet onto the plastic wrap with the shiny side facing down. Then press around 1 cup of rice onto the nori sheet in an even layer. Tip: Wet your hands prior to handling the sushi rice. This will prevent the rice from sticking to your hands.
- Add the avocado and cucumber: Add the avocado slices and cucumber sticks horizontally along the nori sheet. In general, I add 2-3 avocado slices and 1-2 cucumber sticks depending on the size of each ingredient and how everything fits.
- Add the shrimp: Add two pieces of shrimp to the middle of the roll with the tails sticking out of each end.
- Roll the sushi: Use the bamboo sushi mat to fold your roll until it's completely enclosed. Once the rice is making contact with the nori roll, pull back the sushi mat so it doesn't get caught in the roll. Still using the sushi mat as your guide, finish rolling until it's completely wrapped. Then wrap the sushi mat around the roll and gently tighten the roll together. Keep in mind that rolling sushi is an art that may take some practice so don’t get frustrated if it doesn’t look perfect your first time. It will get easier the more you do it.
- Cut the remaining avocado and place on top of the roll: The remaining avocados need to be sliced thinly to be added to the top of each roll. To do this, cut in half the long way and remove the skin and seed. Then cut each half into thin slices going the short way of the avocado. Cut the slices as thin as you can or around 1-2 millimeters thick. Once cut, use your hand to gently push the avocados to the side so they fold over on top of each other. Then place all the slices of one half of the avocado on top of your roll. I would also drizzle lemon juice over the avocado after cutting to prevent it from browning in your sushi roll.
- Use the bamboo sushi mat to press the avocado slices onto the roll: Since the avocado slices have a tendency to come apart, I would suggest covering the roll in plastic first. Then wrap the sushi mat around the roll and firmly press the mat onto the roll, forming the avocado slices to the top of the roll. Leave the plastic on the roll for cutting.
- Cut the roll: Using a sharp knife, cut the roll into 8 pieces through the plastic wrap. I do this by first cutting the roll in half. Then cutting each half in half. Then cutting each fourth in half. This should give you 8 pieces that are equal size.Once done cutting, remove the plastic from each of the pieces.Tip: Be sure to clean and wet the edge of your knife before cutting each roll. This will prevent the roll from sticking to your knife.
- Garnish with sesame seeds: Lightly sprinkle sesame seeds over the top of the avocado.
- Optional: Lightly drizzle with unagi (eel) sauce over the top of the avocado.
- Serve and enjoy: I usually serve with soy sauce and wasabi. Sushi rolls are traditionally served with pickled ginger as well.
Video
Notes
- You can control how thick your sushi rolls are by how much of the nori sheet you use. This recipe uses the entire nori sheet which makes thicker rolls. If you like smaller rolls, you can cut the nori sheet in half. This will definitely make the roll thinner and easier to eat with chopsticks but it can be trickier to roll. You can also cut off the top 1/4 of the nori sheet to reduce the thickness of the roll depending on your preference.
- I always prepare the shrimp and heat the oil before mixing the tempura batter to make sure the batter is good and cold when you cook. You should begin cooking your shrimp immediately after mixing the batter.
- Make sure you dry the shrimp well prior to frying or else it will pop in the oil.
Nutrition
Frequently Asked Questions
Is a dragon roll gluten free?
Most often if you order dragon rolls from a sushi restaurant, they will not be gluten free as the shrimp tempura contains flour and the unagi (eel) sauce contains soy sauce, which is not gluten free. However, if you make your own dragon rolls, you can substitute the flour for a gluten free 1 to 1 substitute and you can either omit the unagi sauce or make your own with gluten free soy sauce.
Is a dragon roll cooked?
Yes. All the ingredients in a dragon roll are cooked.
Final Thoughts About Dragon Roll Sushi
While there are more steps to prepare this roll than other types of sushi, it’s a fun roll to feed the family while giving your kids a healthy dose of avocados. This would also be an impressive addition to any sushi platter. We hope you have found this informational and fun. Happy cooking!
Check out below for more sushi articles:
Delicious Philadelphia Roll Sushi Recipe
Alaska Roll Sushi Recipe: Easy Step-by-Step Instructions
Also, subscribe to our YouTube Channel for some great videos!